- Updated 2025-05-09: Added “SL-6602-TBE” pinout. Thanks a lot to Jörg Knitter!
- Updated 2022-03-09: Added “SL-6603-TWT” pinout. Thanks a lot to Risto K!
- Updated 2022-01-26: Added “V2” pinout.
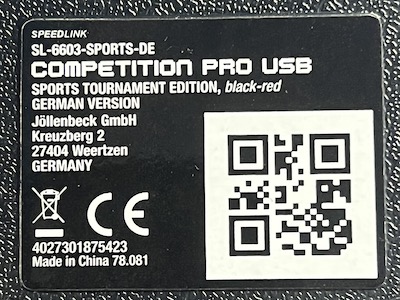
- Updated 2022-01-22: Added “SL-6603-SPORTS-DE” pinout.
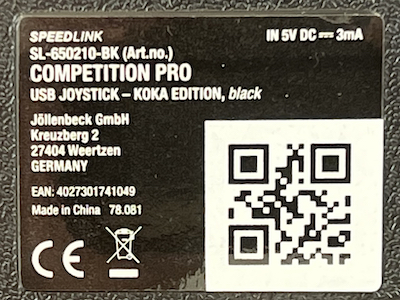
- Updated 2022-01-14: Added “SL-6603-SBK” and “KOKA” pinouts.
- Updated 2022-01-06: Added new “V3” and “V04T” pinouts and instructions on how to use a joystick extension cable.
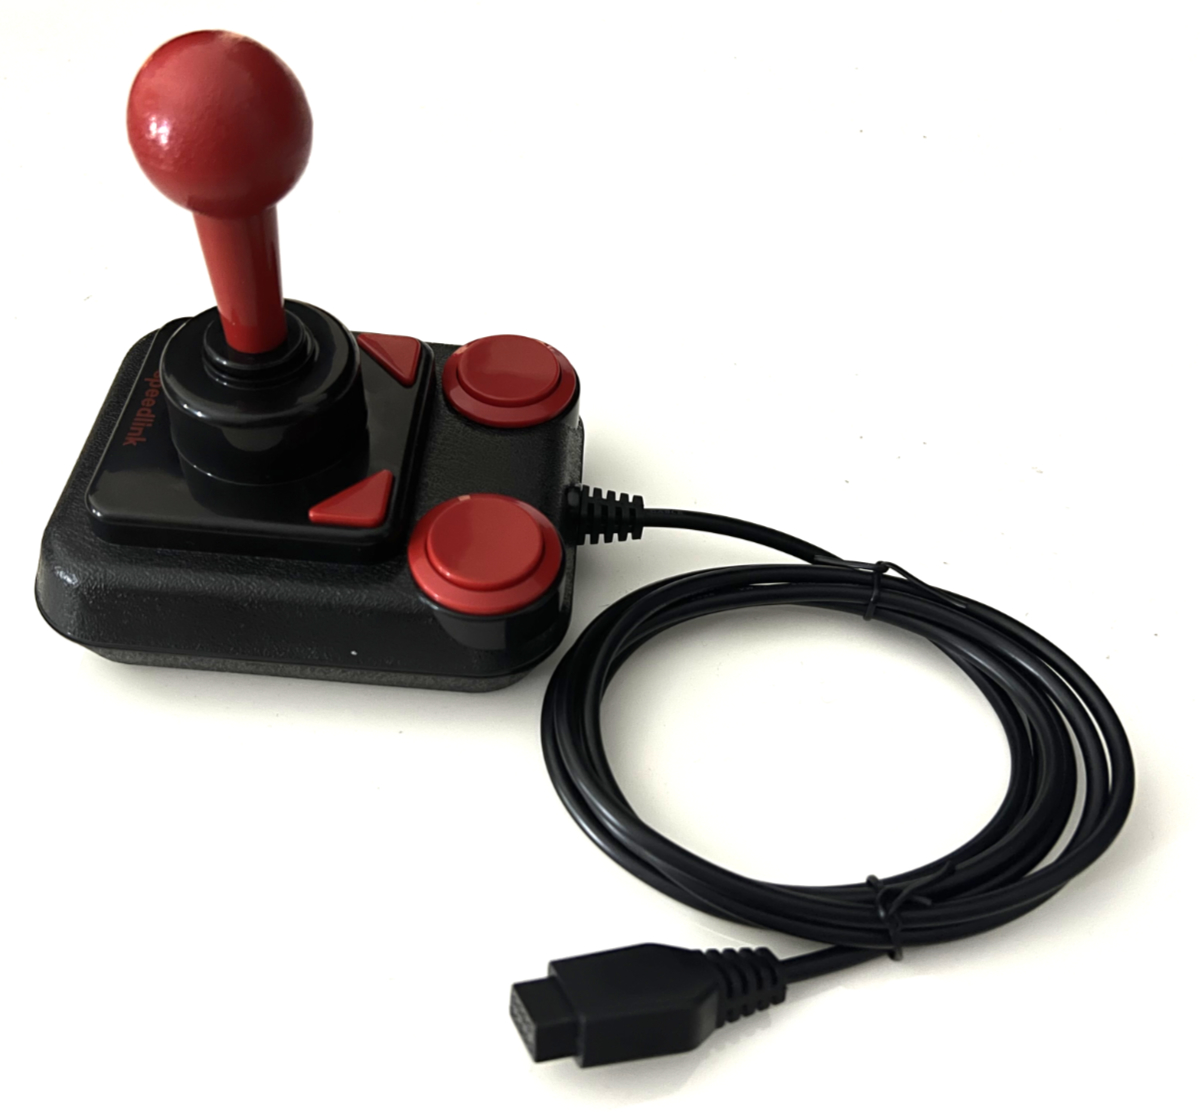
Speedlink makes several versions of the Competition Pro joystick that have all the physical properties and the excellent switches of the original Competition Pro, but come with a USB interface:
| Art.no. | EAN | Name |
|---|---|---|
| SL-6602-TBE | 4027301066029 | Competition Pro (“Return of a Legend”) |
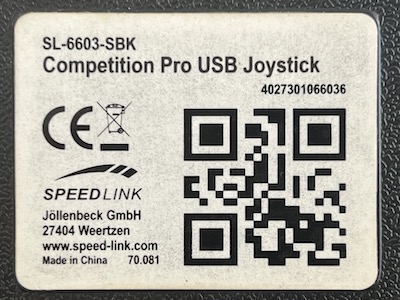
| SL-6603-SBK | 4027301066036 | Competition Pro USB |
| SL-6603-GOLD | 4027301166033 | Competition Pro 25th Anniversary Edition, Gold |
| SL-6603-TWT | 4027301266030 | Competition Pro USB transparent + Game-Collection |
| SL-6603-SPORTS | 4027301366037 | Competition Pro USB Summer & Winter Games Edition |
| SL-6603-SPORTS-EU | 4027301183818 | Competition Pro USB Sports Tournament Edition (EU) |
| SL-6603-SPORTS-DE | 4027301875423 | Competition Pro USB Sports Tournament Edition (German) |
| SL-650210-BK | 4027301741049 | Competition Pro KOKA Edition |
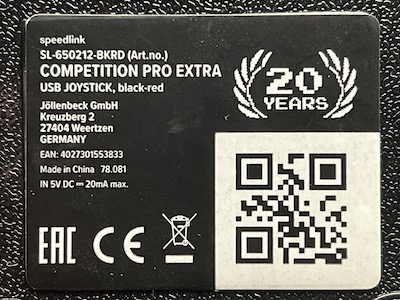
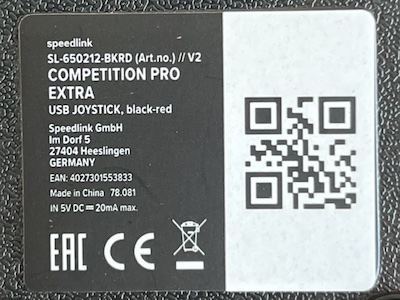
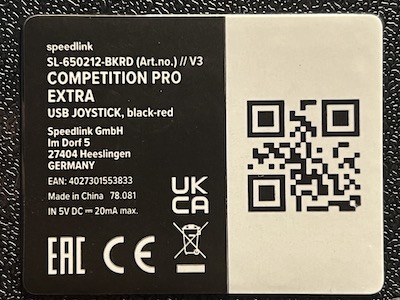
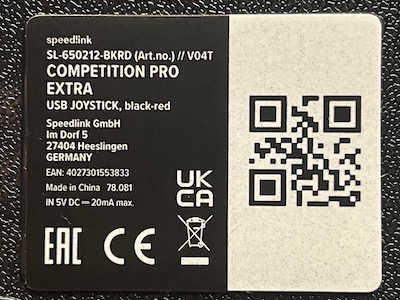
| SL-650212-BKRD | 4027301553833 | Competition Pro Extra |
(Only the last two are currently available new, the others are historic.)
All versions of this joystick can be easily converted into an old-school DB9 joystick to work with Commodore, Amiga and Atari computers and consoles – optionally without giving up the USB interface!
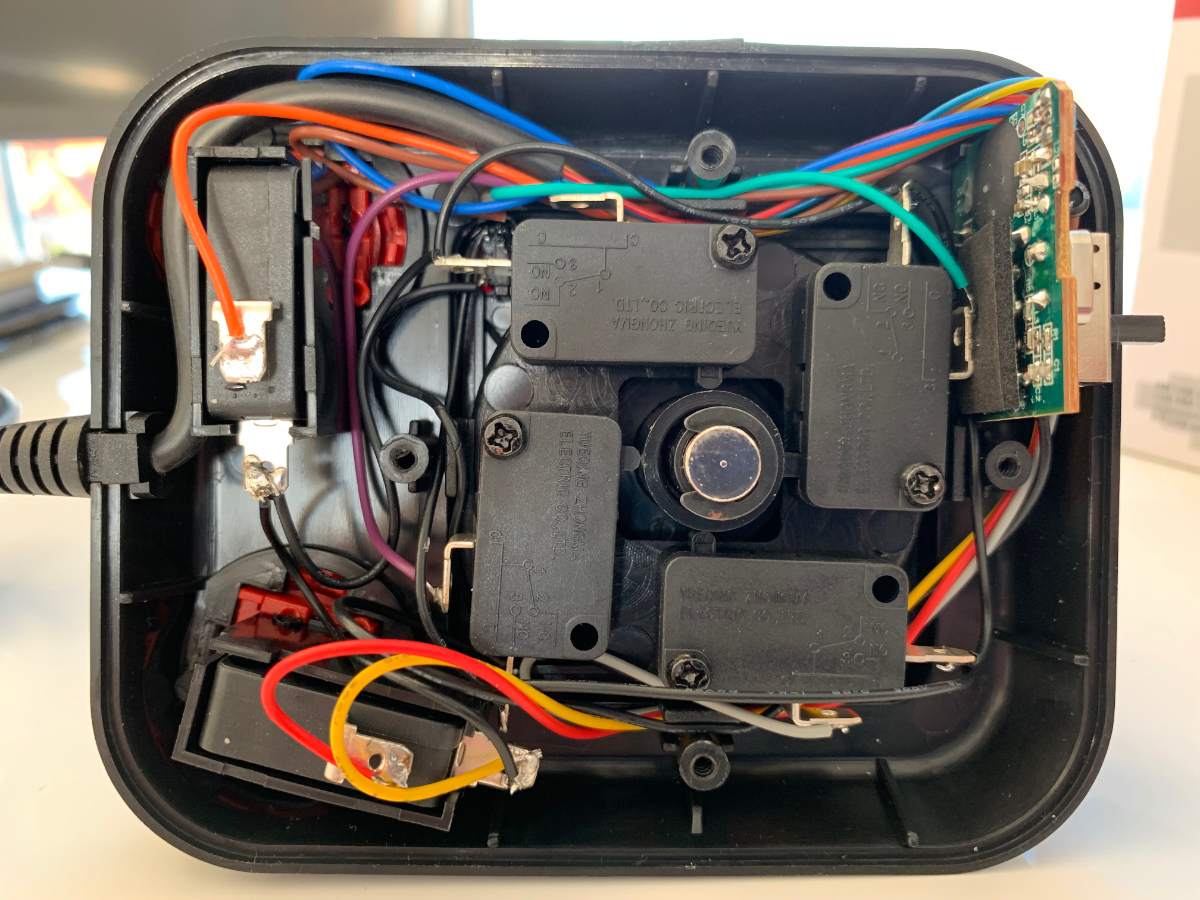
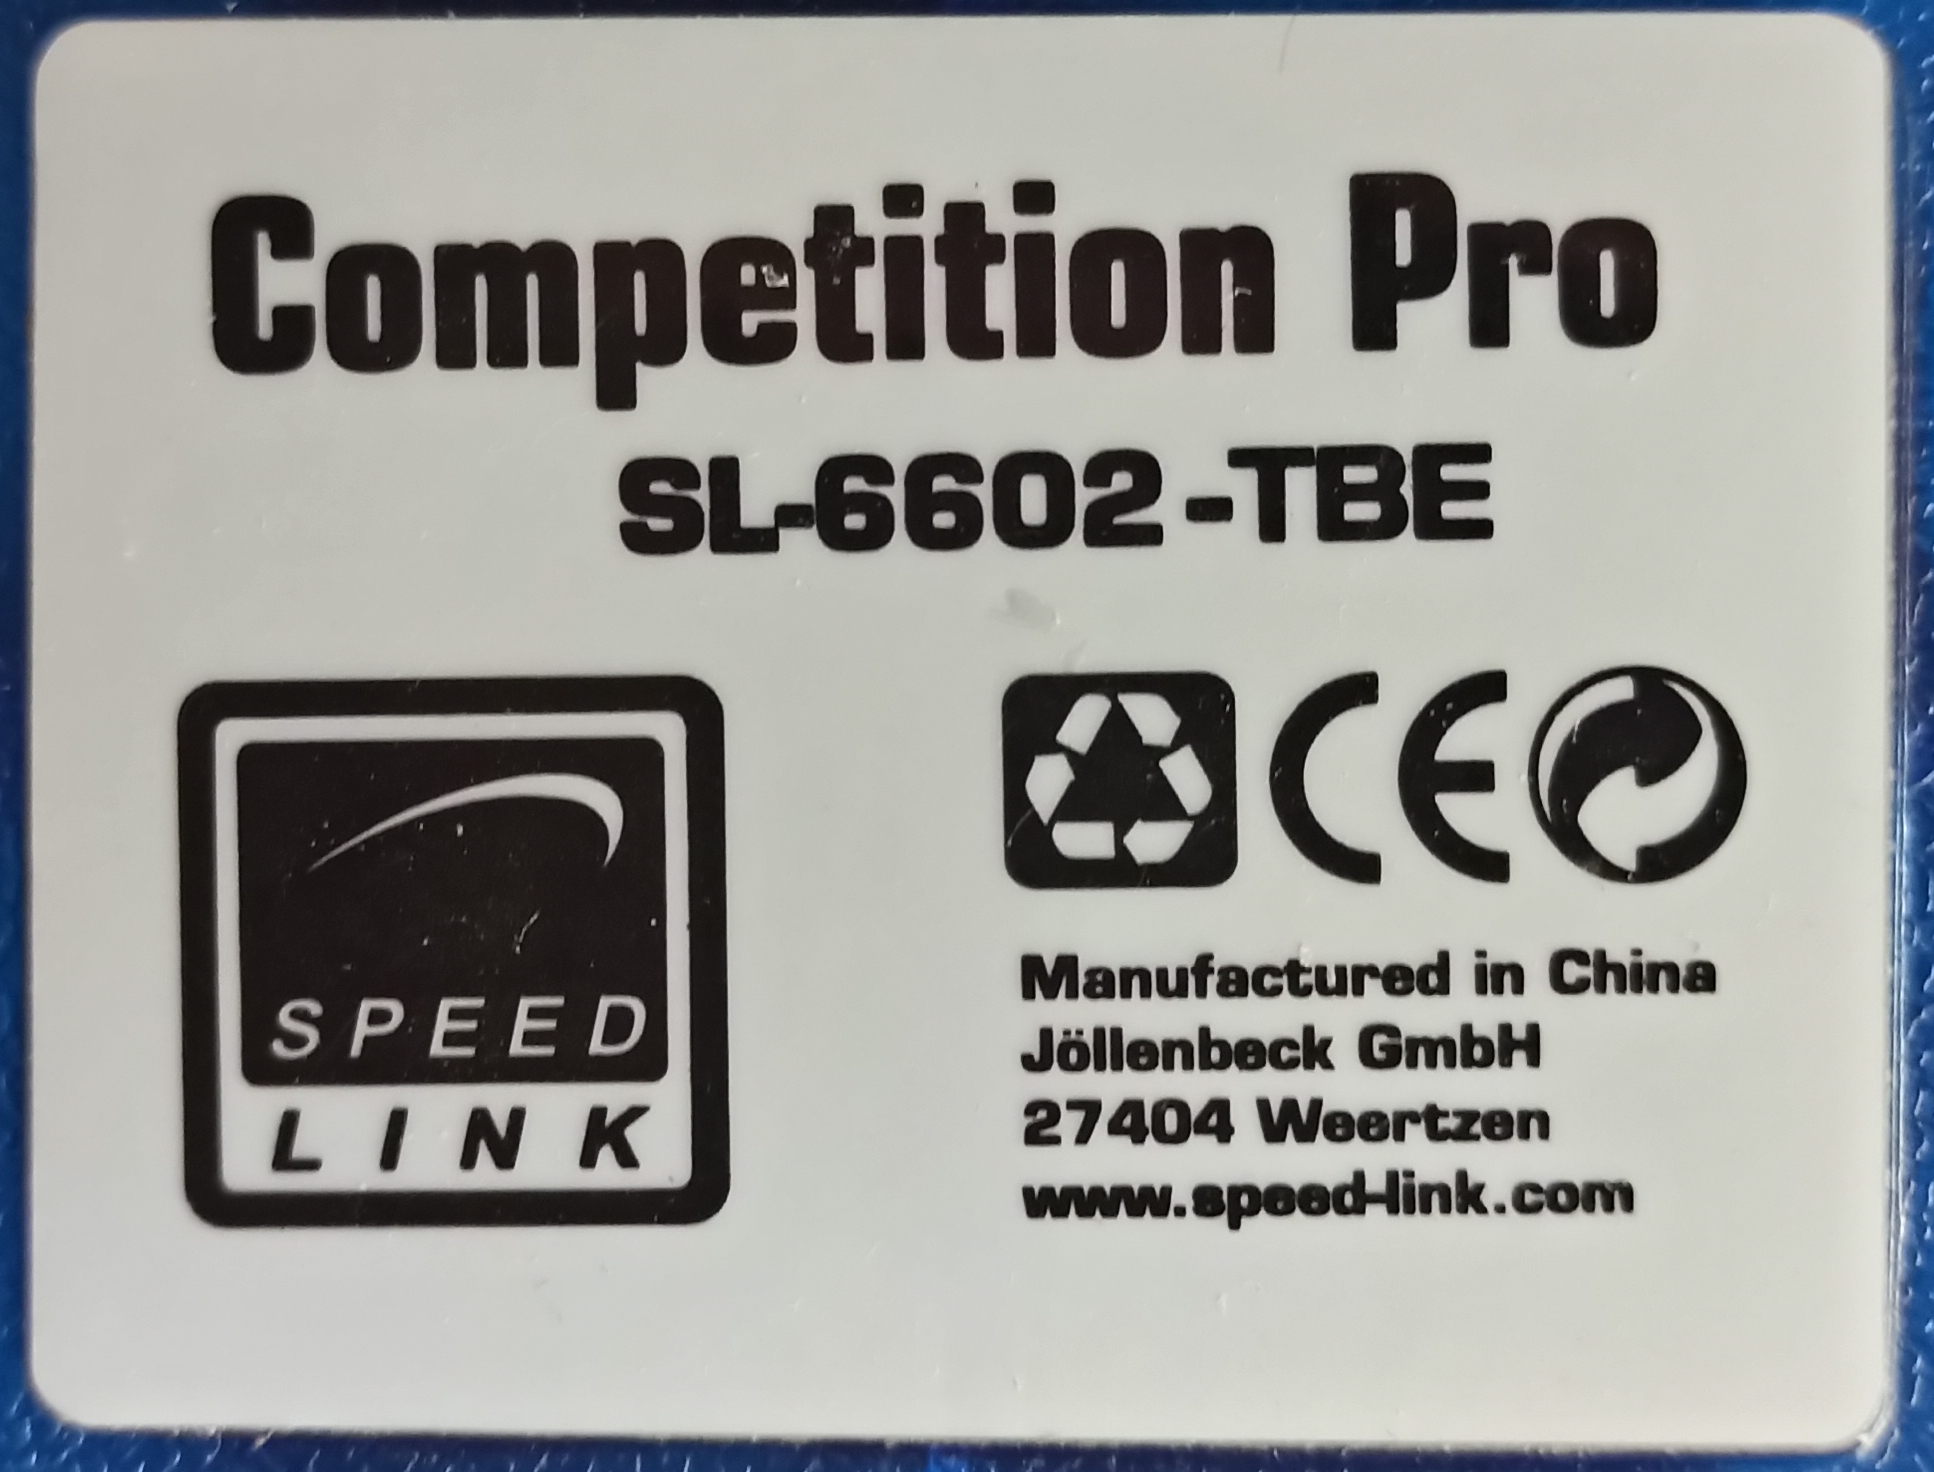
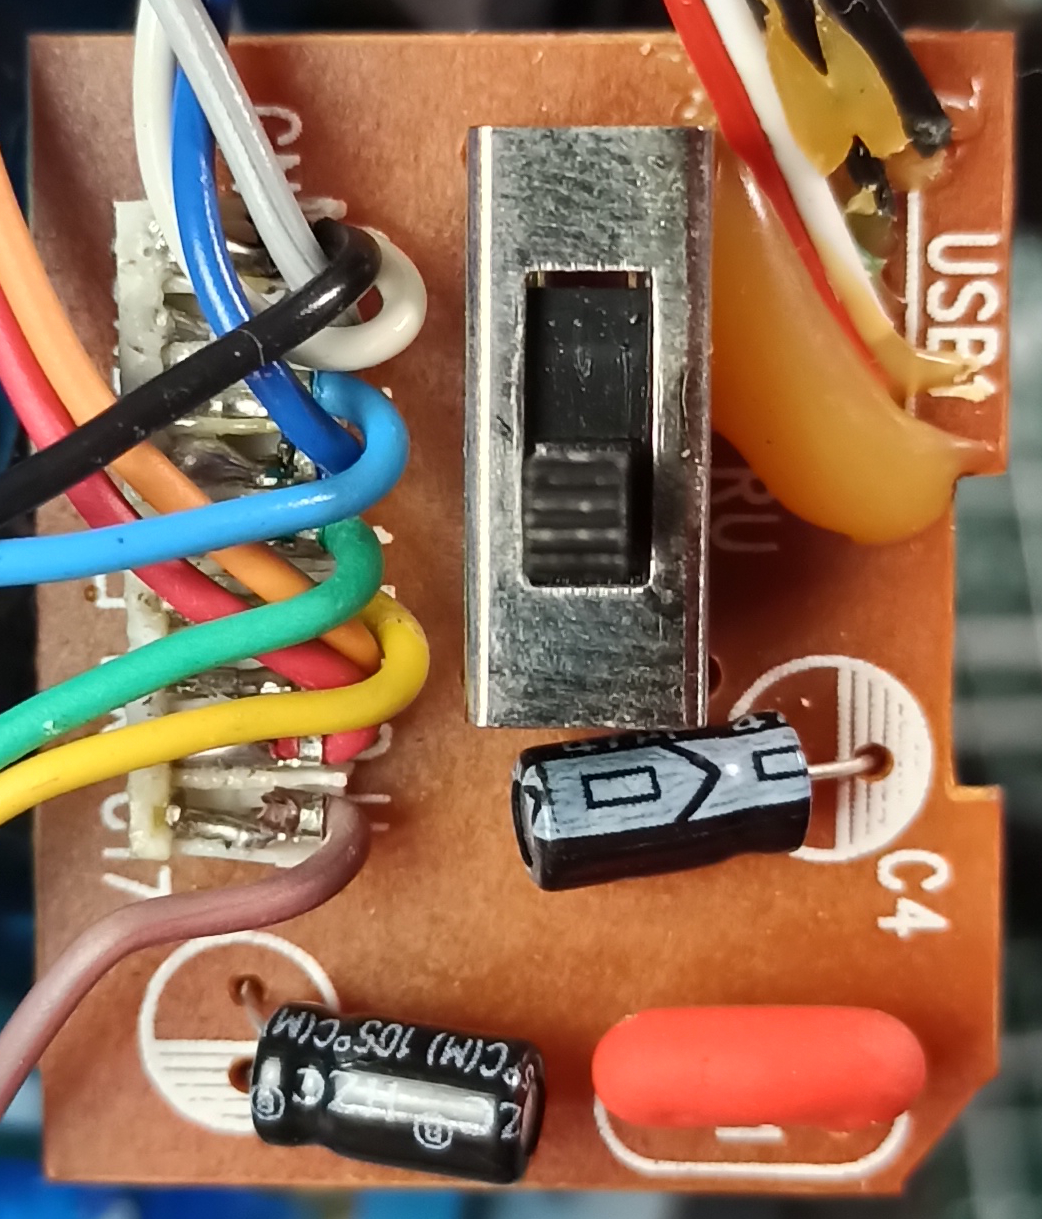
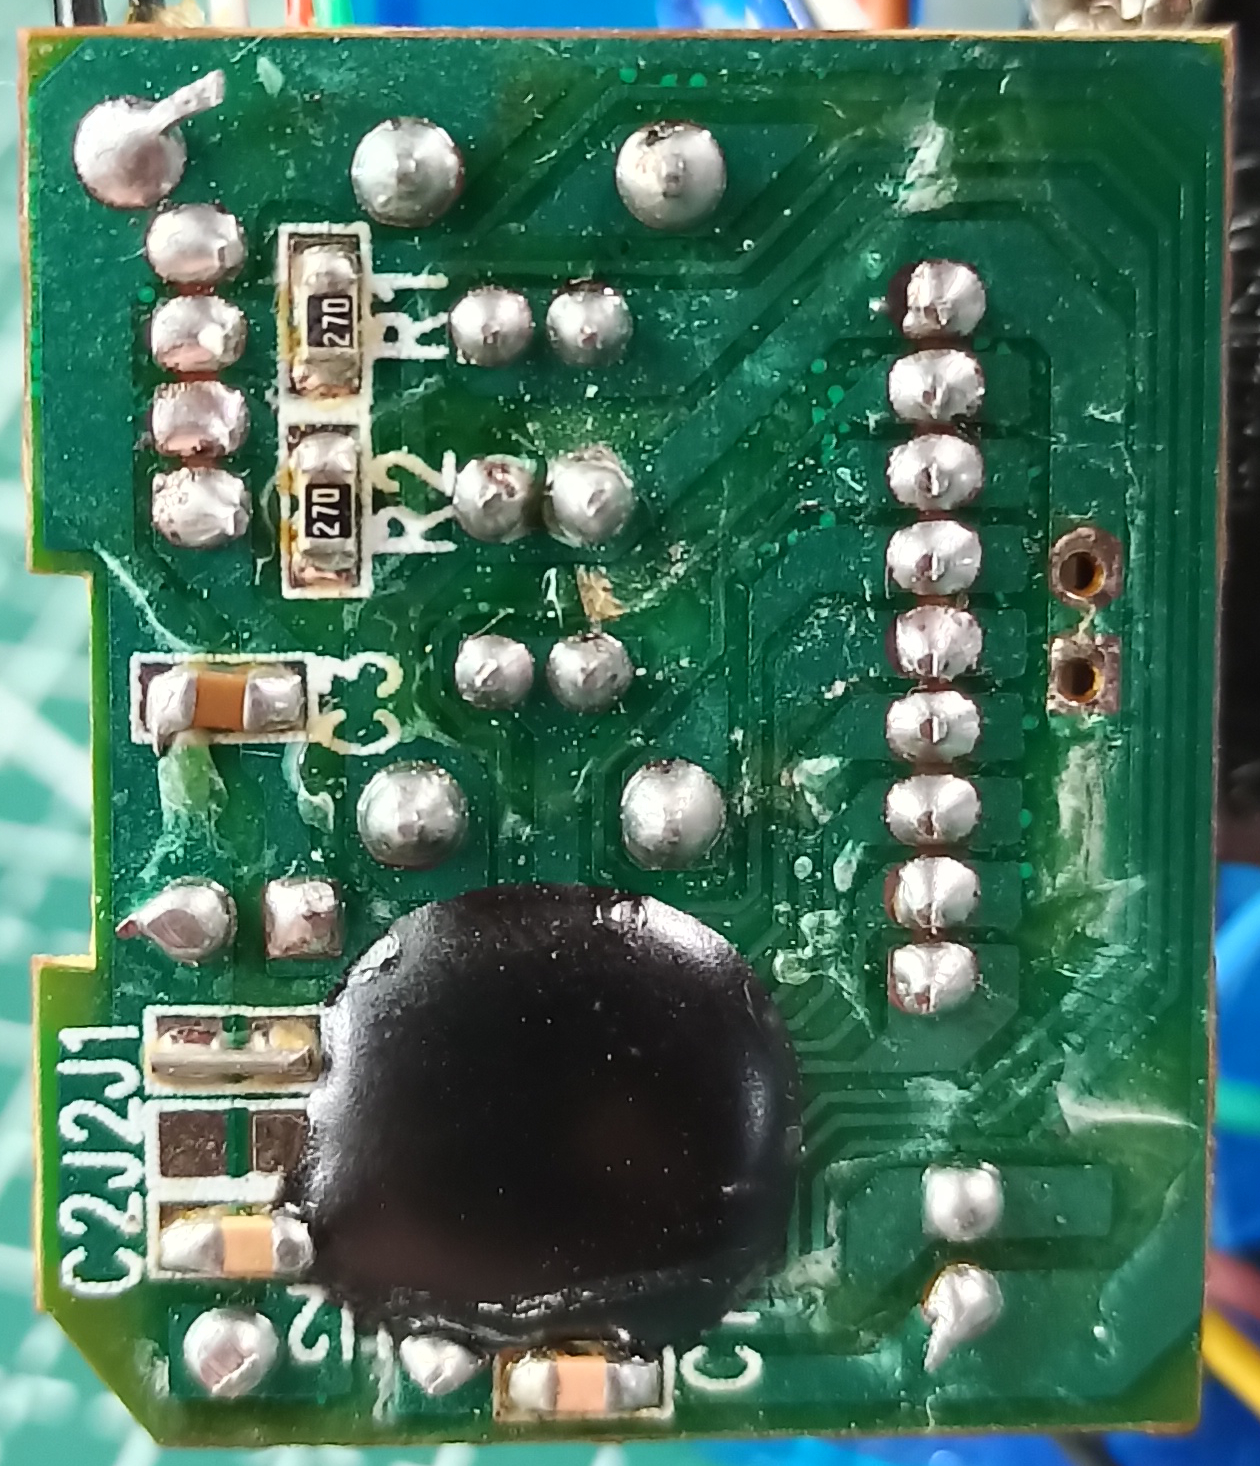
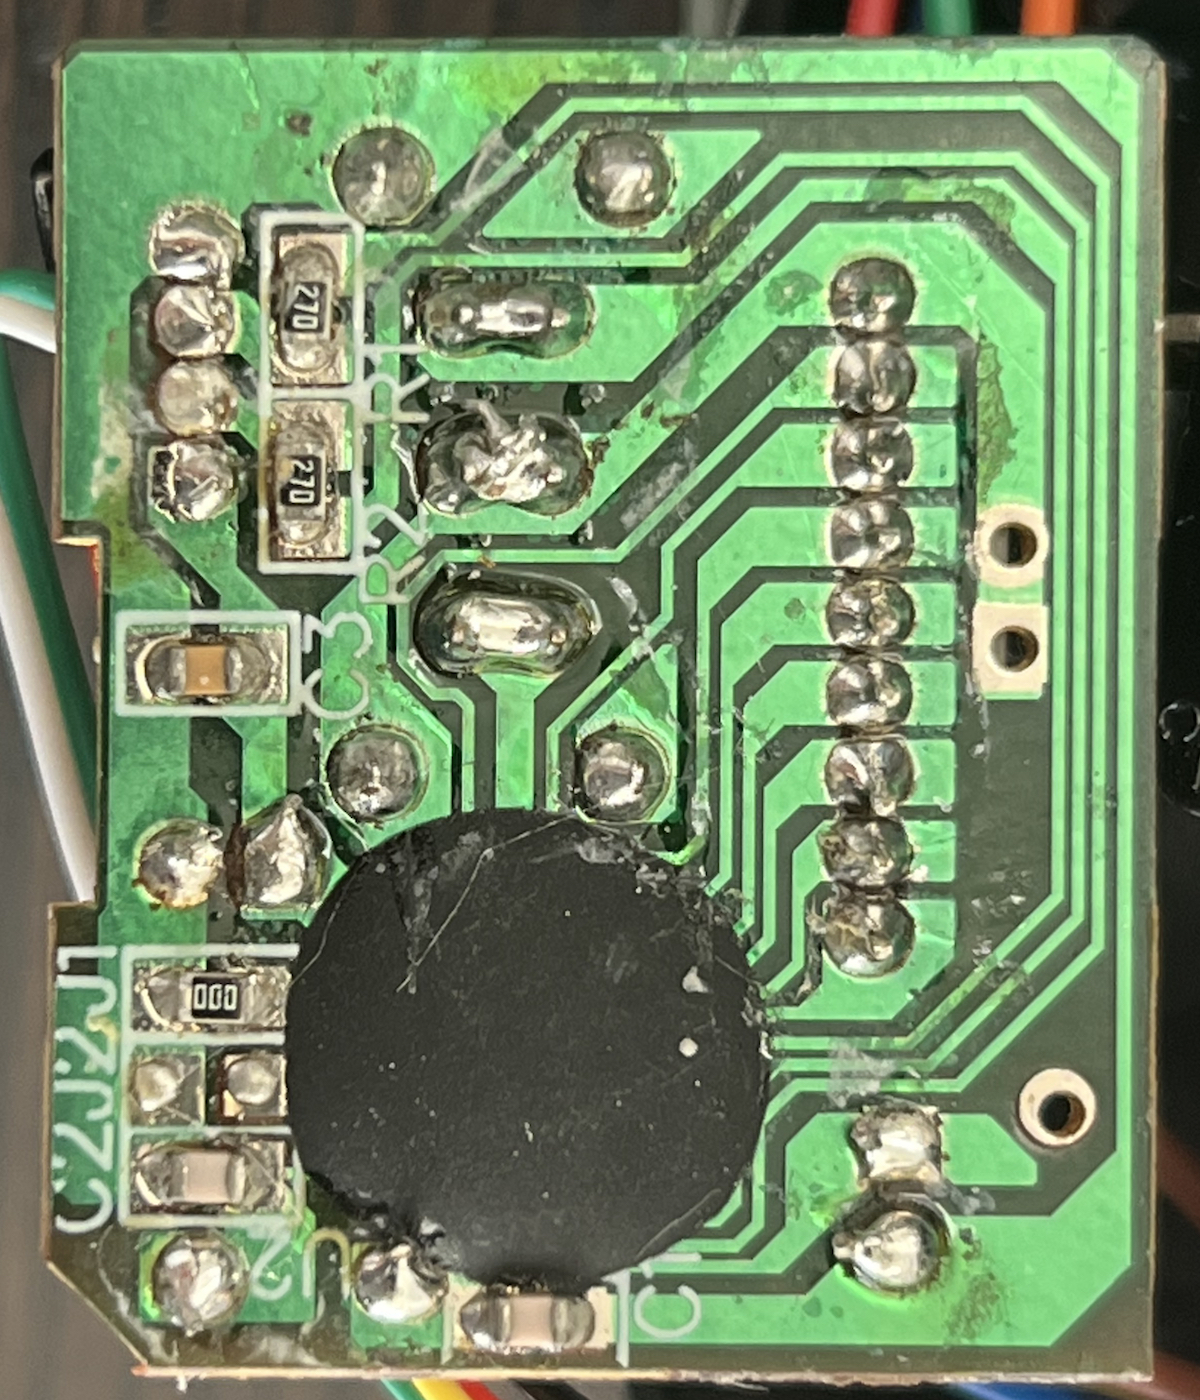
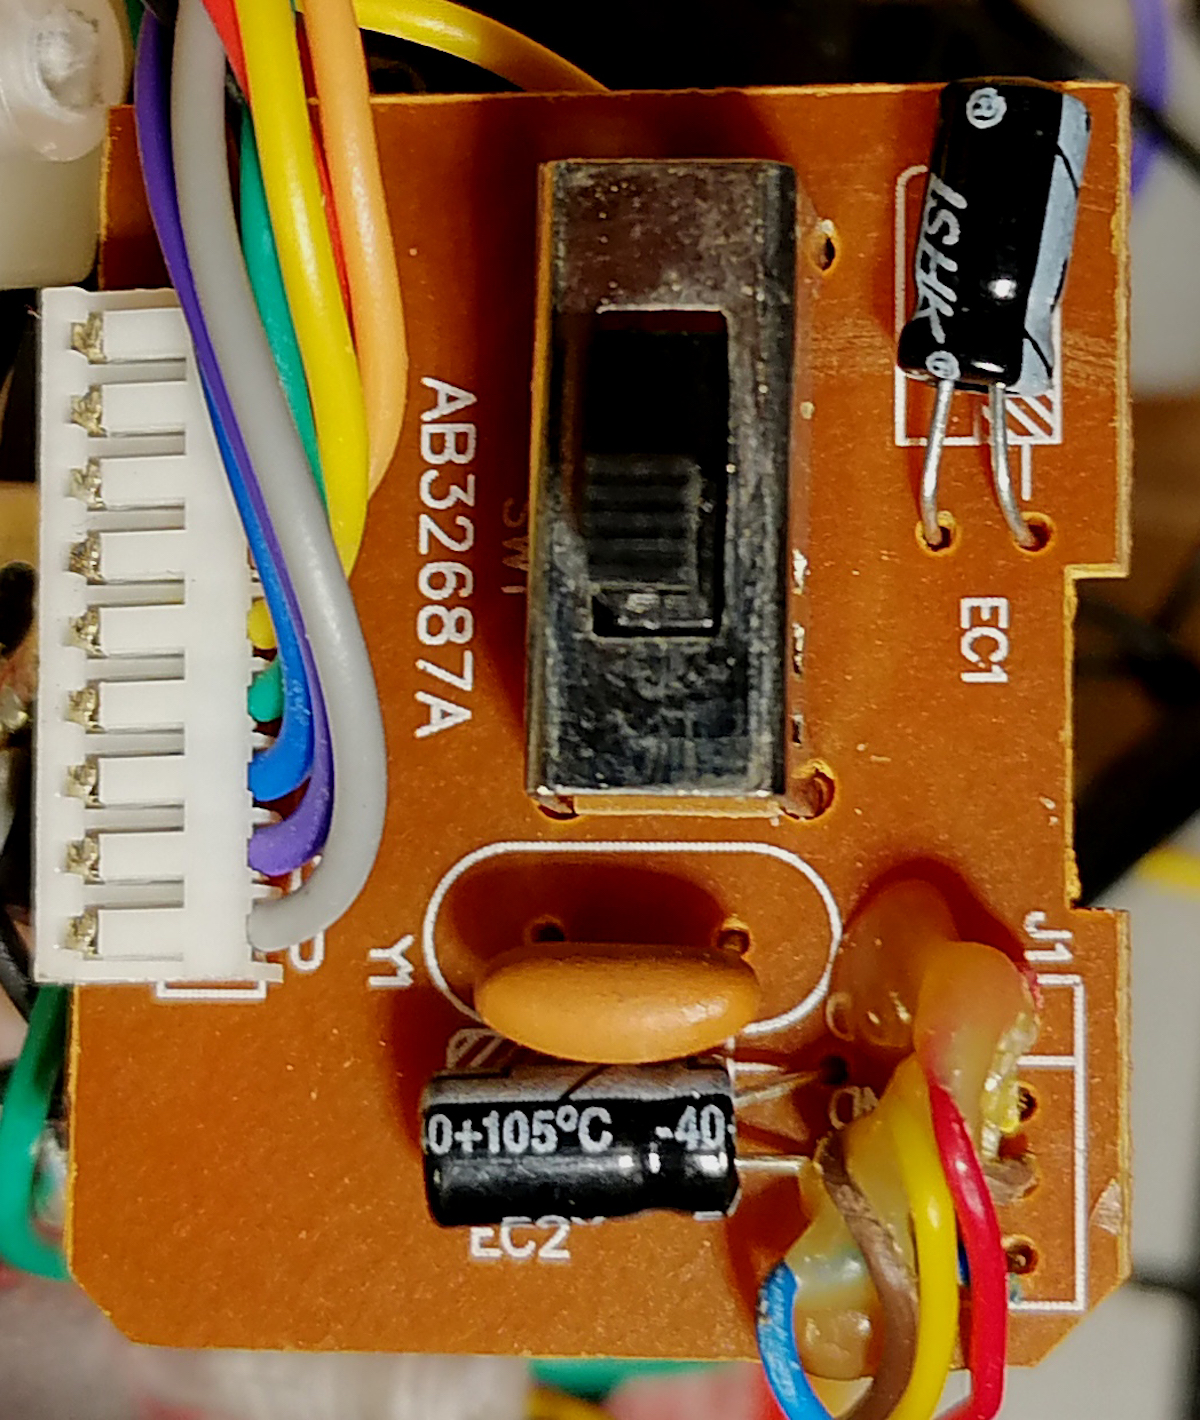
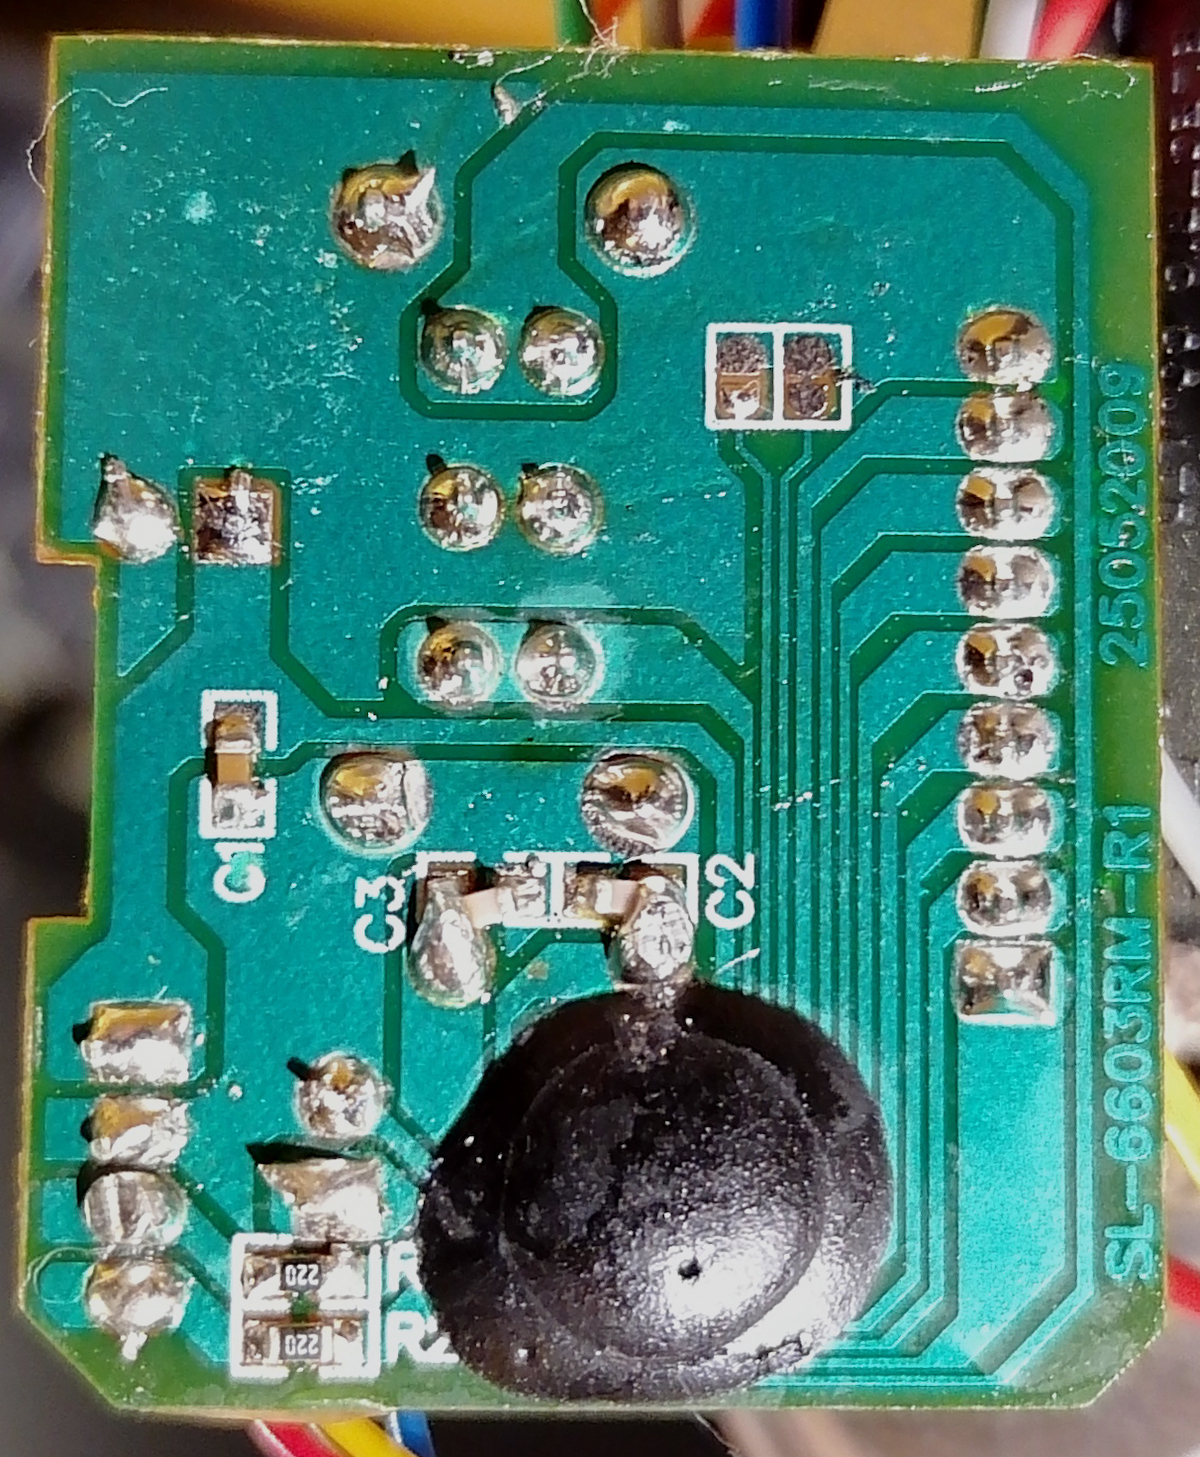
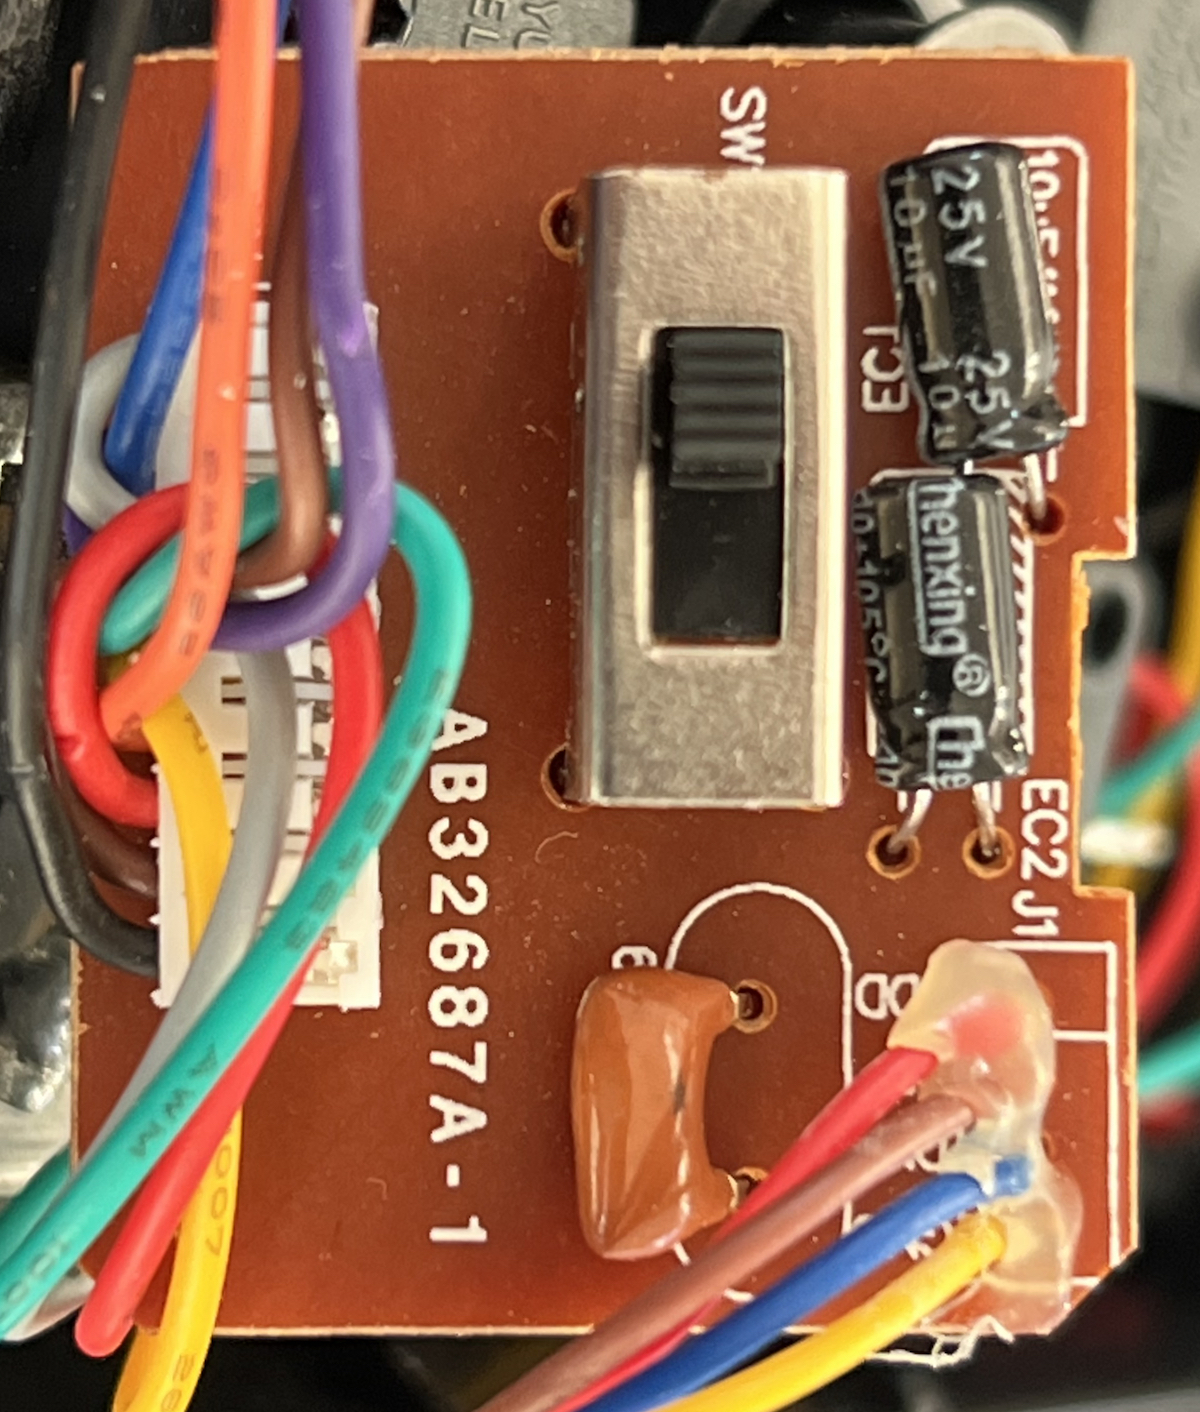
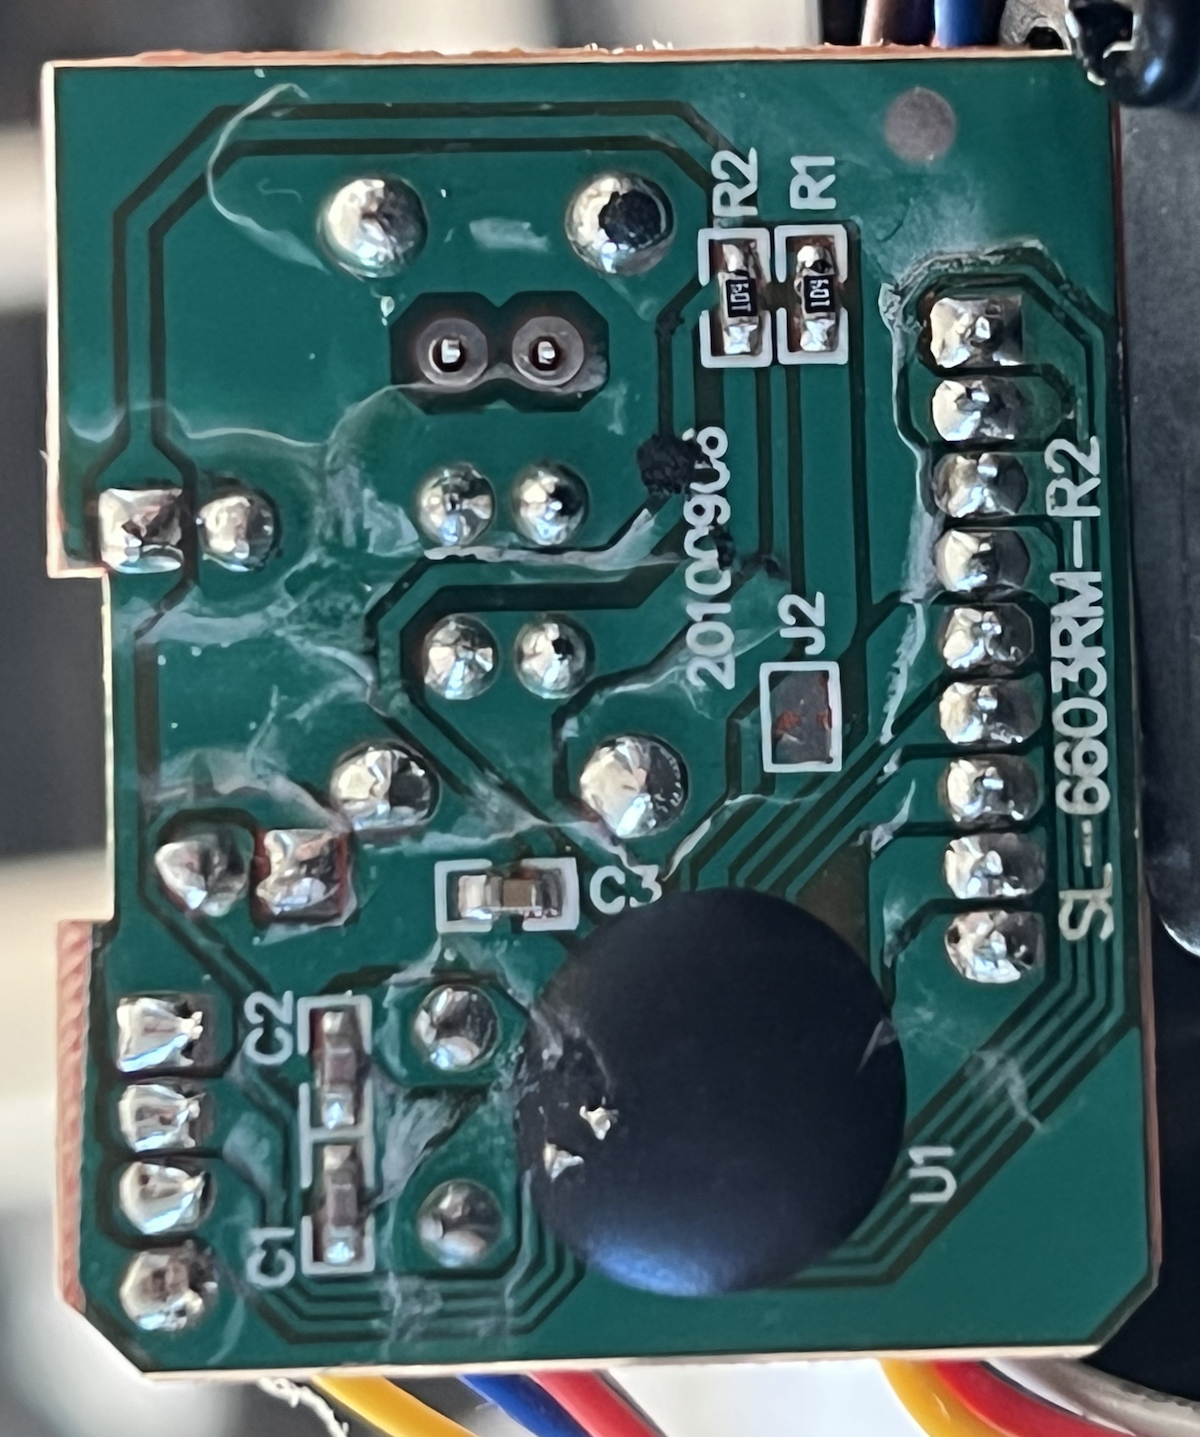
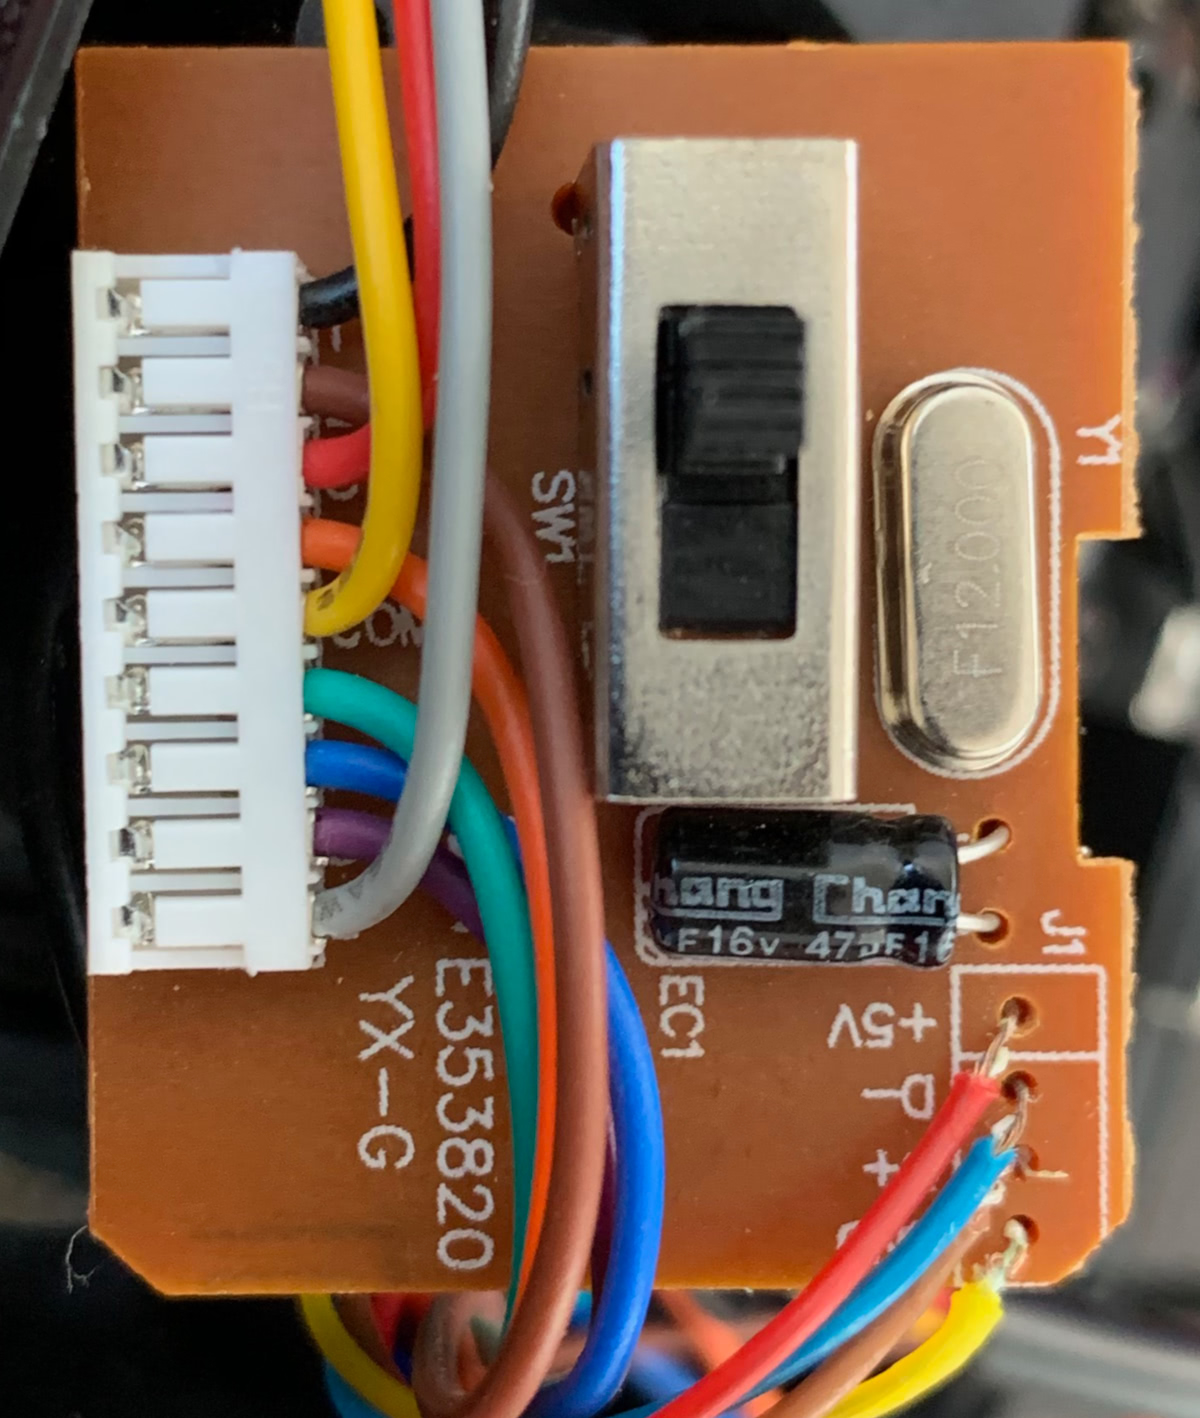
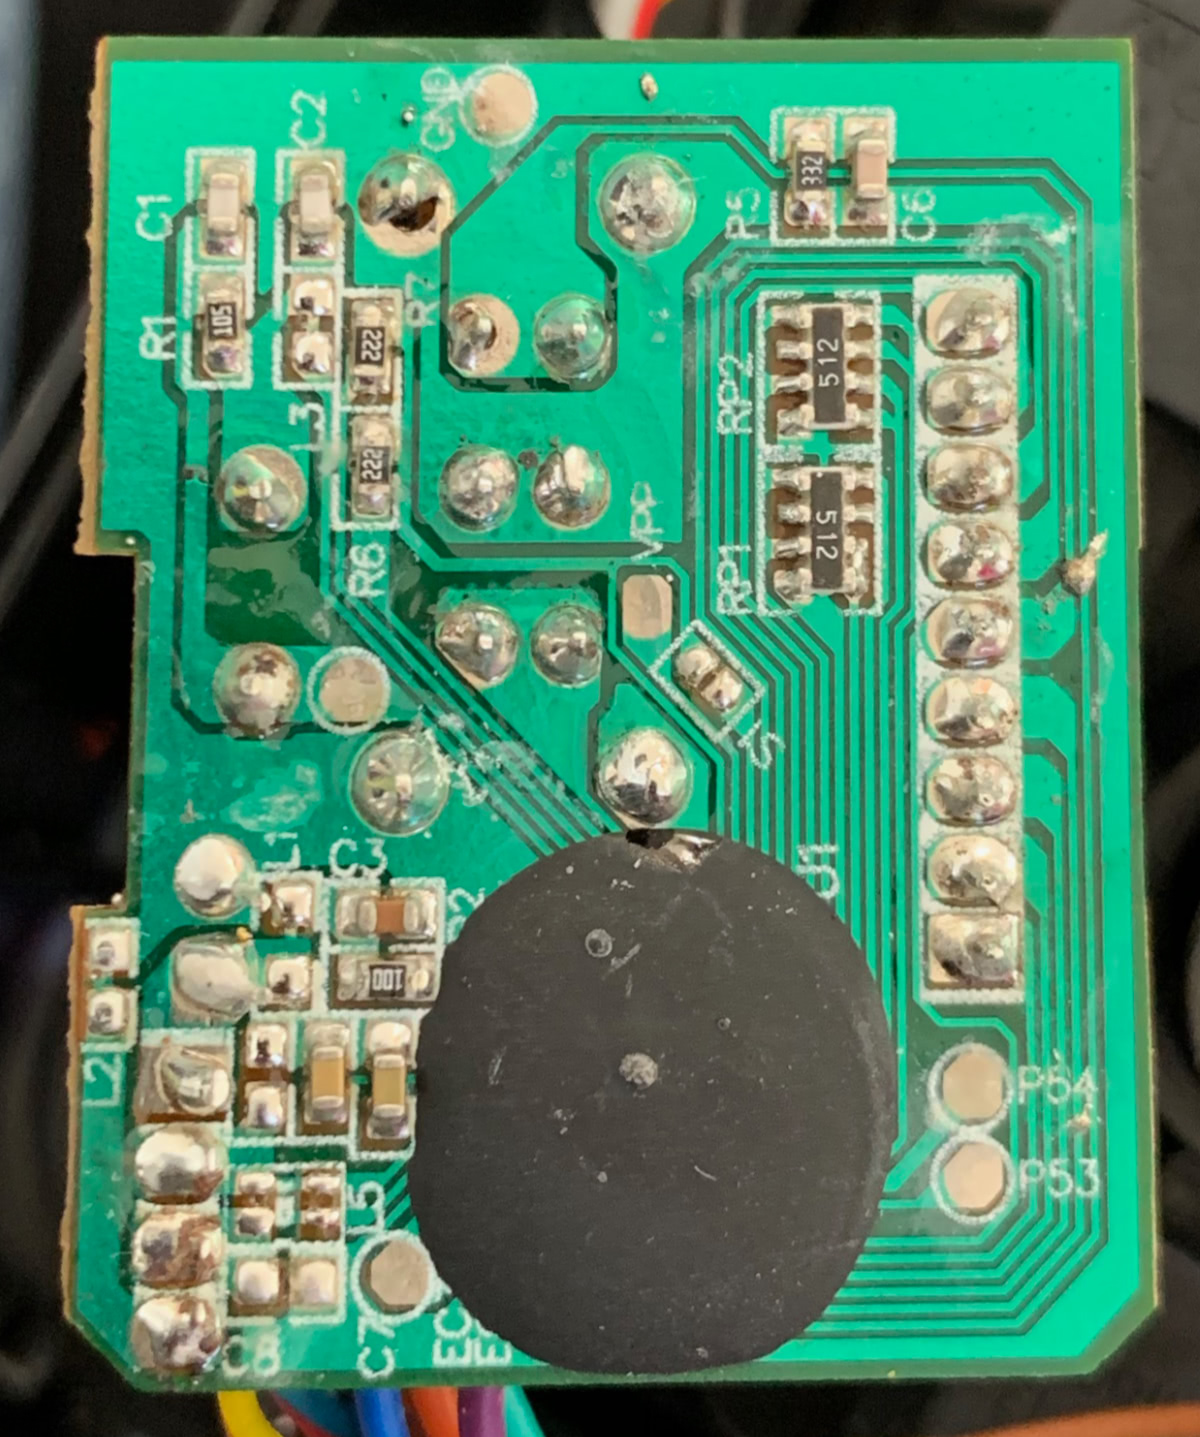
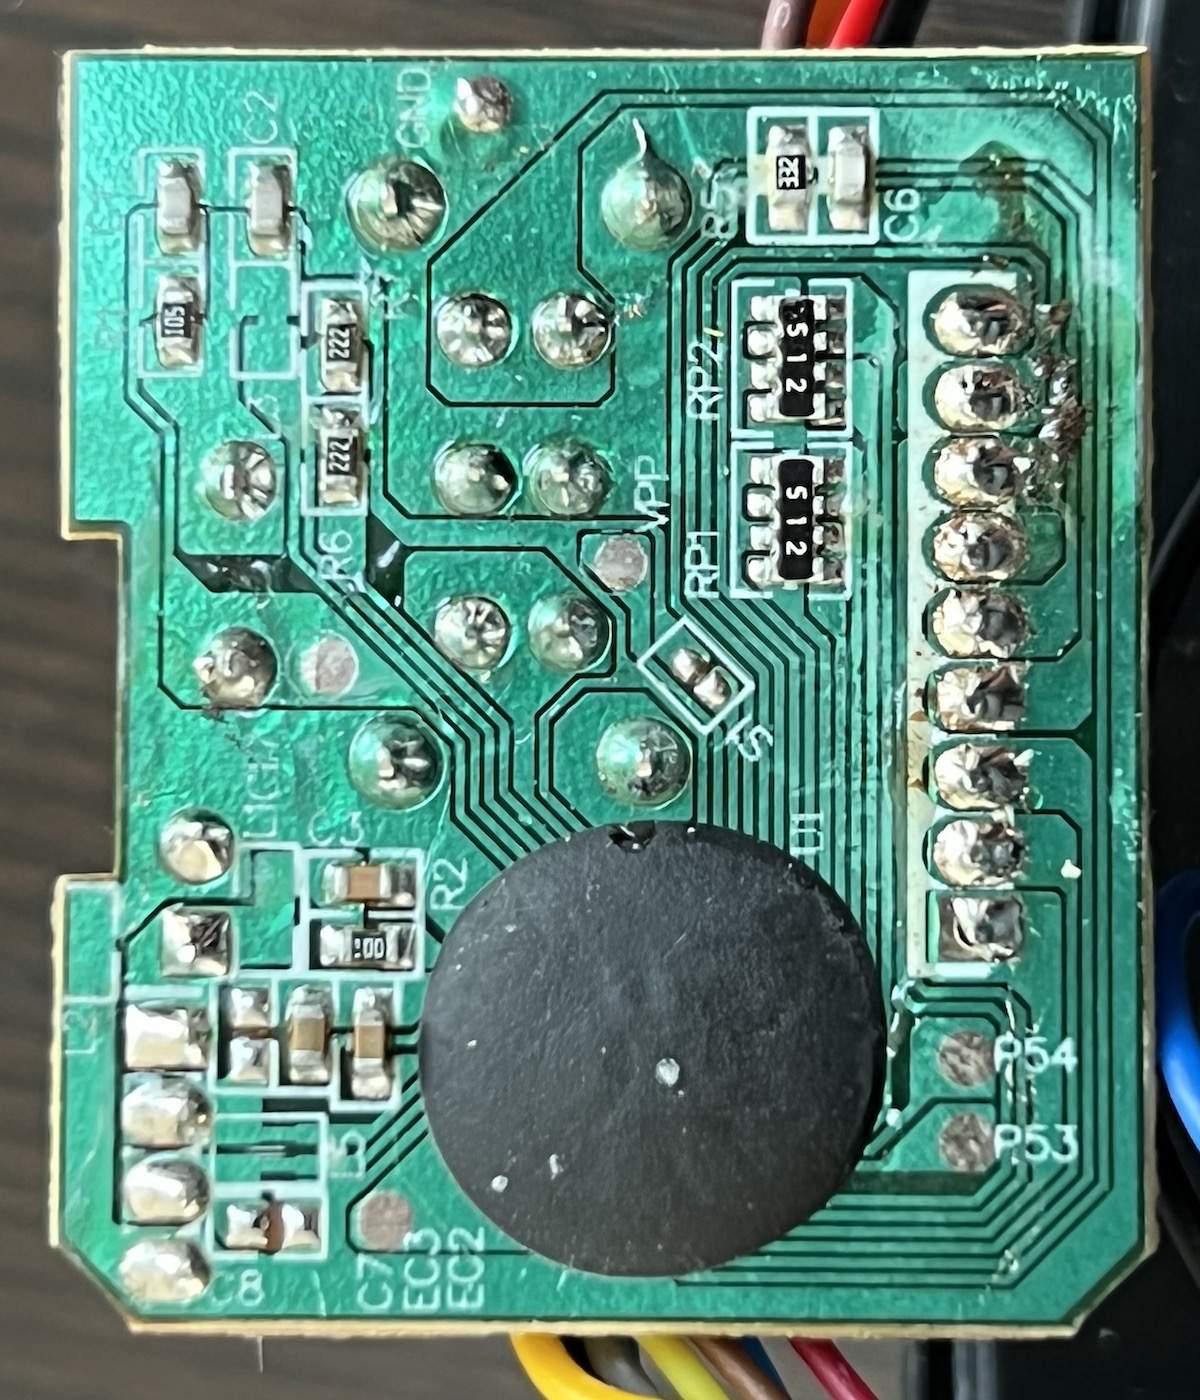
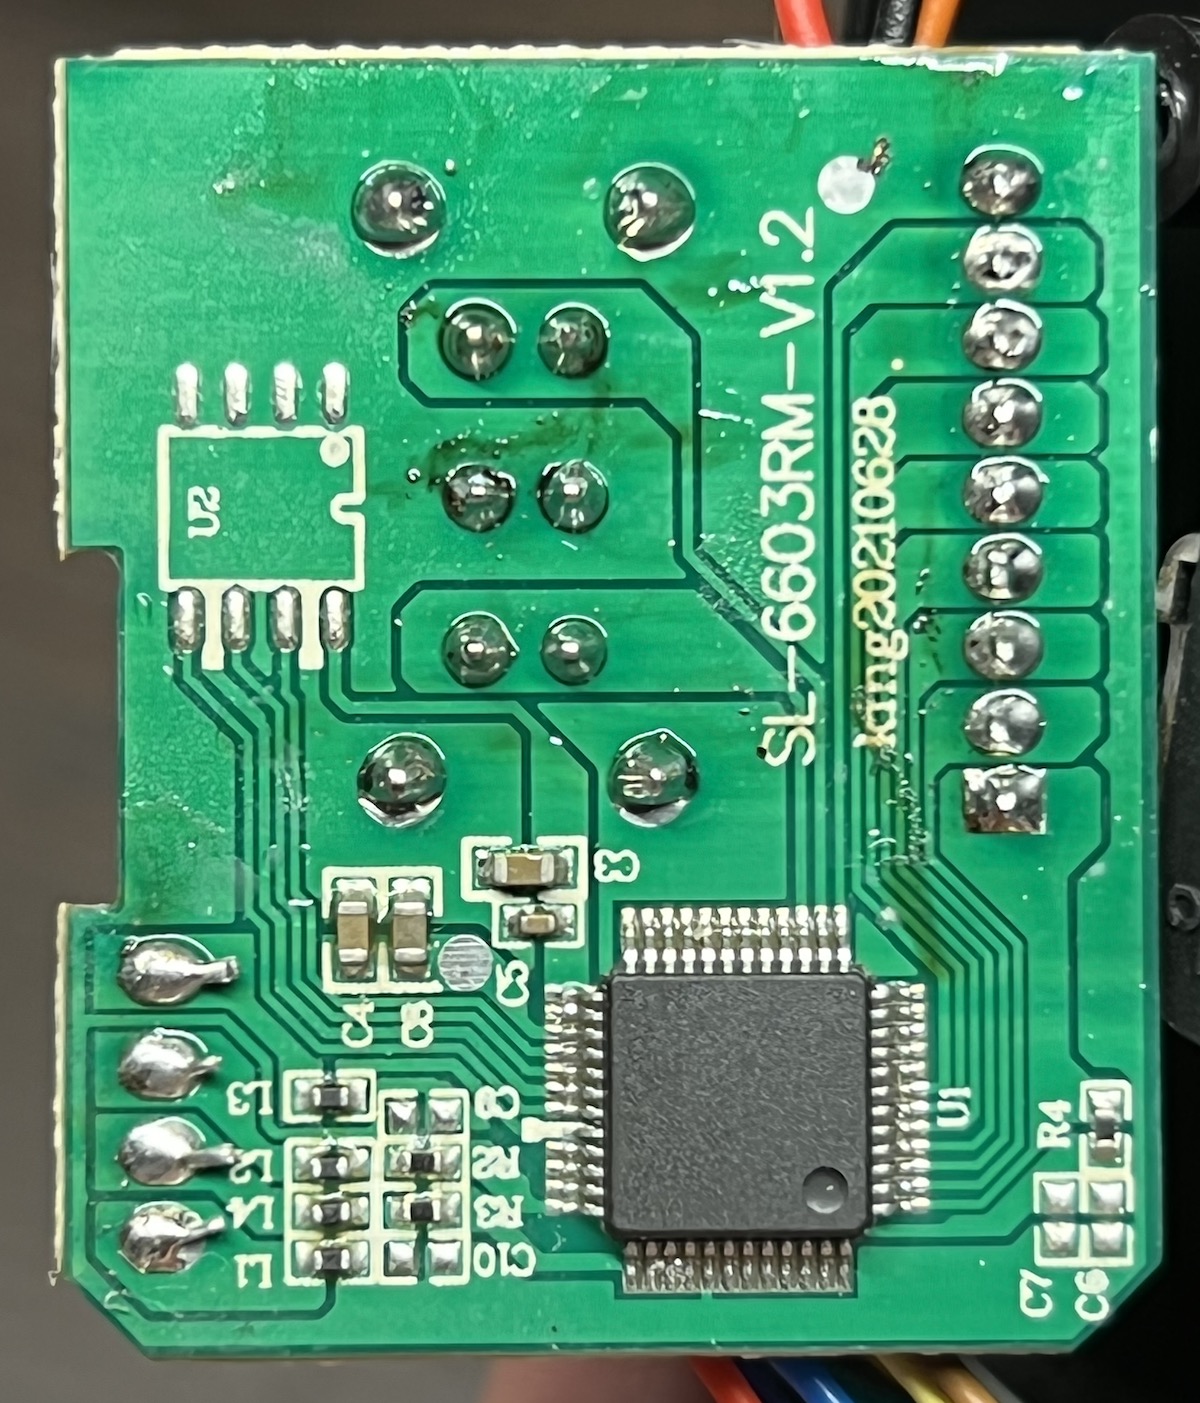
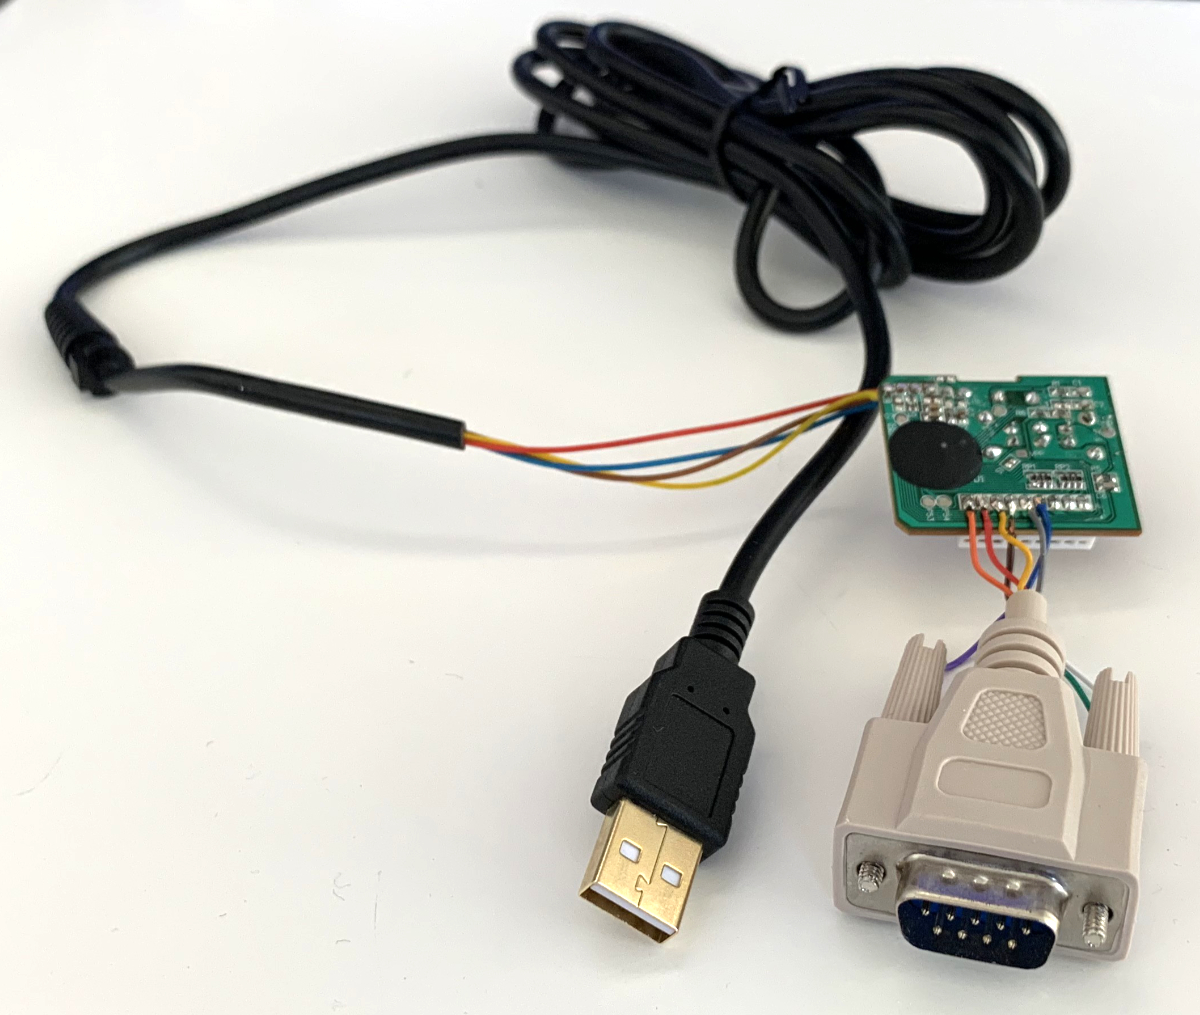
There is a small board inside that converts the output of the switches to USB. There are several versions of the board, and you can tell which one you have from the article number and its optional suffix, printed on both the bottom of the box and the label on the bottom of the joystick.
| Name | Label |
Board
|
|---|---|---|
| Competition Pro USB SL-6602-TBE |
 |
  |
| Competition Pro USB SL-6603-SBK |
 |
  |
| Competition Pro USB transparent SL-6603-TWT |
 |
  |
| Competition Pro USB Sports Tournament Edition (EU) SL-6603-SPORTS-EU Competition Pro KOKA Edition |
  |
  |
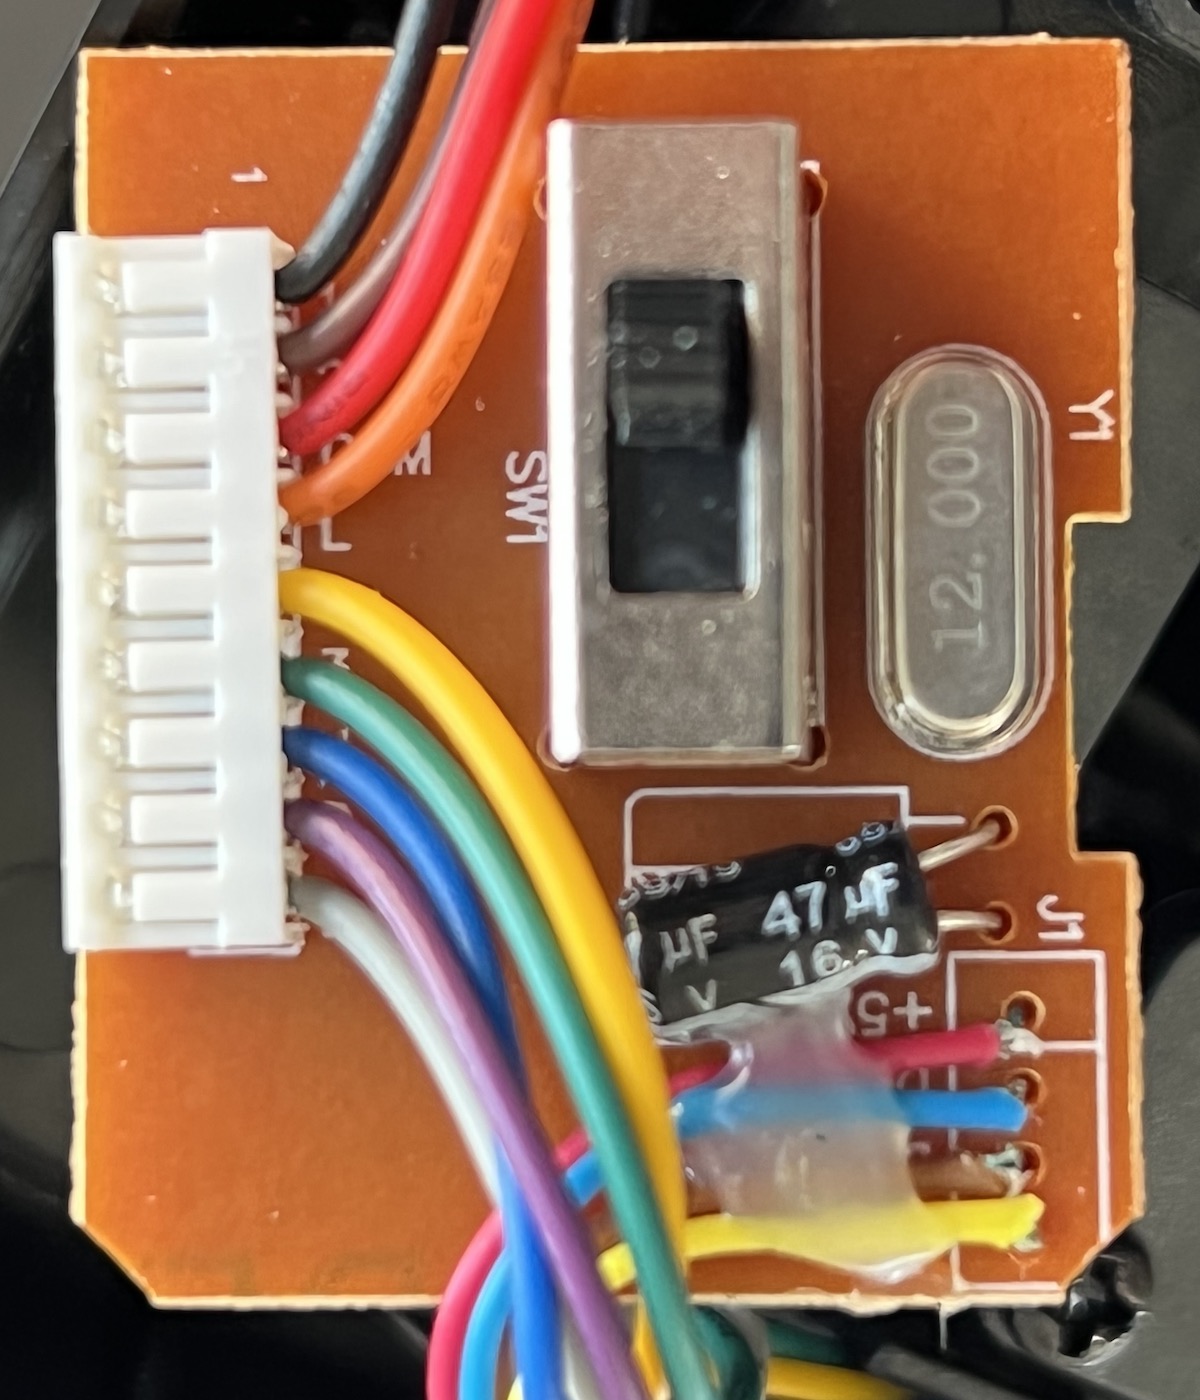
| Competition Pro Extra Anniversary Edition SL-650212-BKRD no-suffix |
 |
  |
| Competition Pro Extra SL-650212-BKRD // V2 |
 |
  |
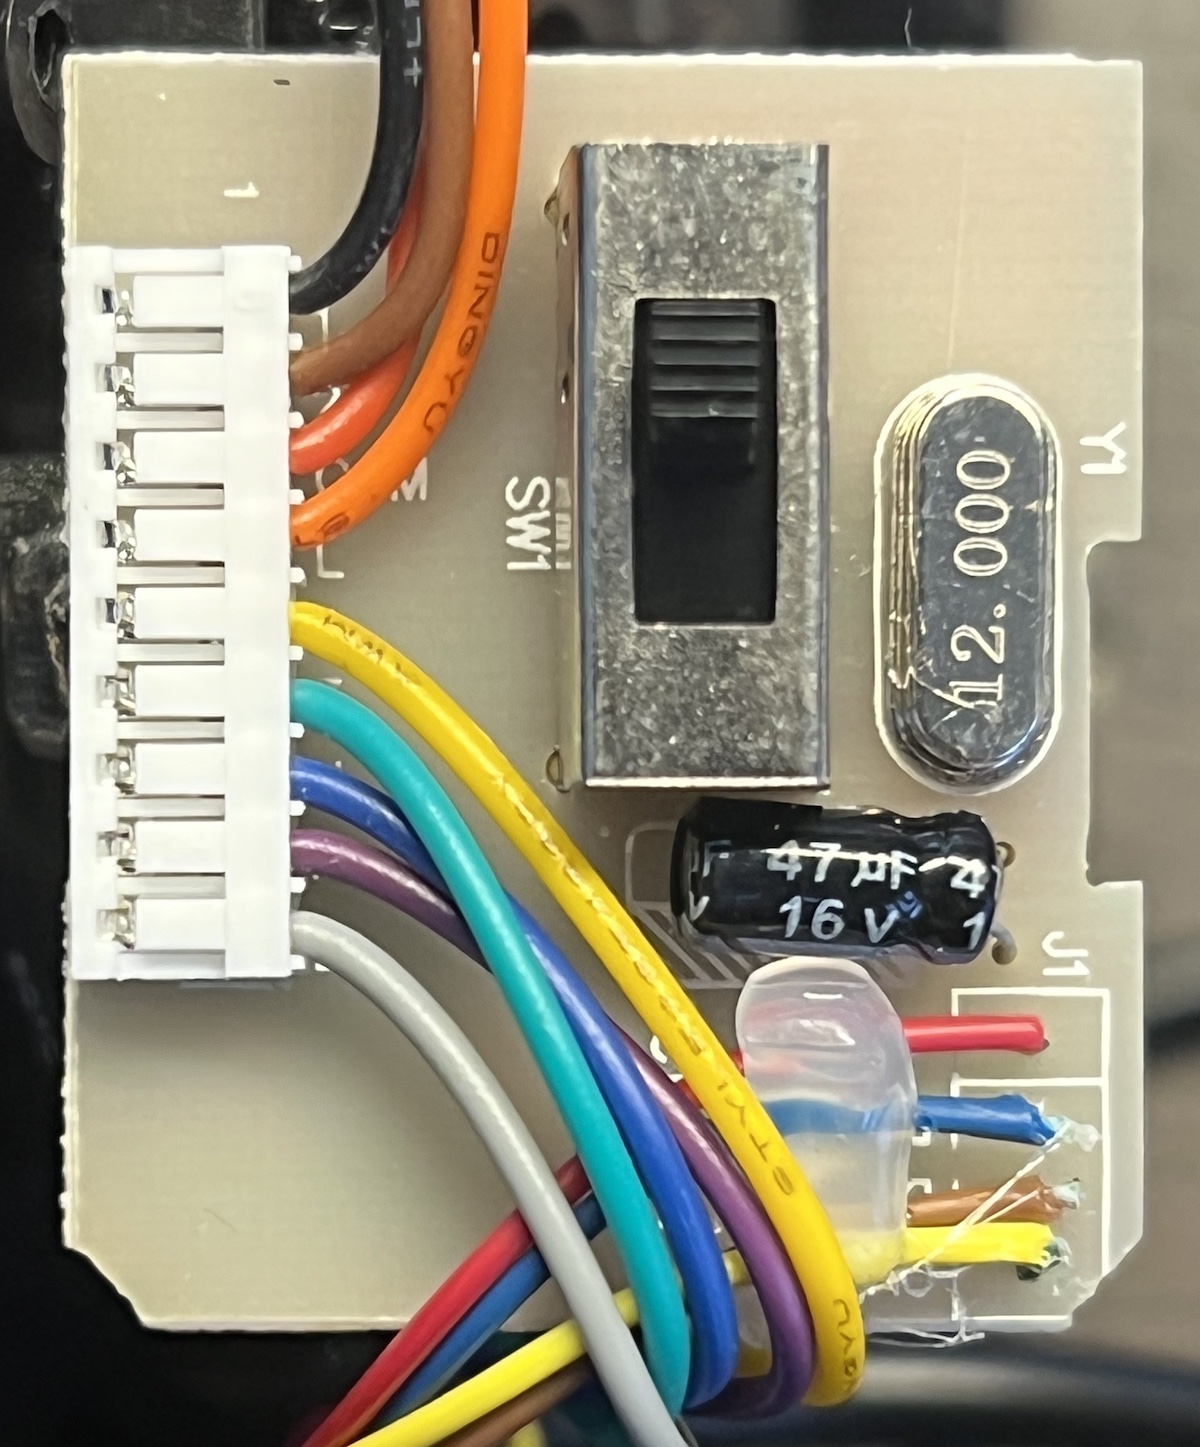
| Competition Pro Extra SL-650212-BKRD // V3 |
 |
 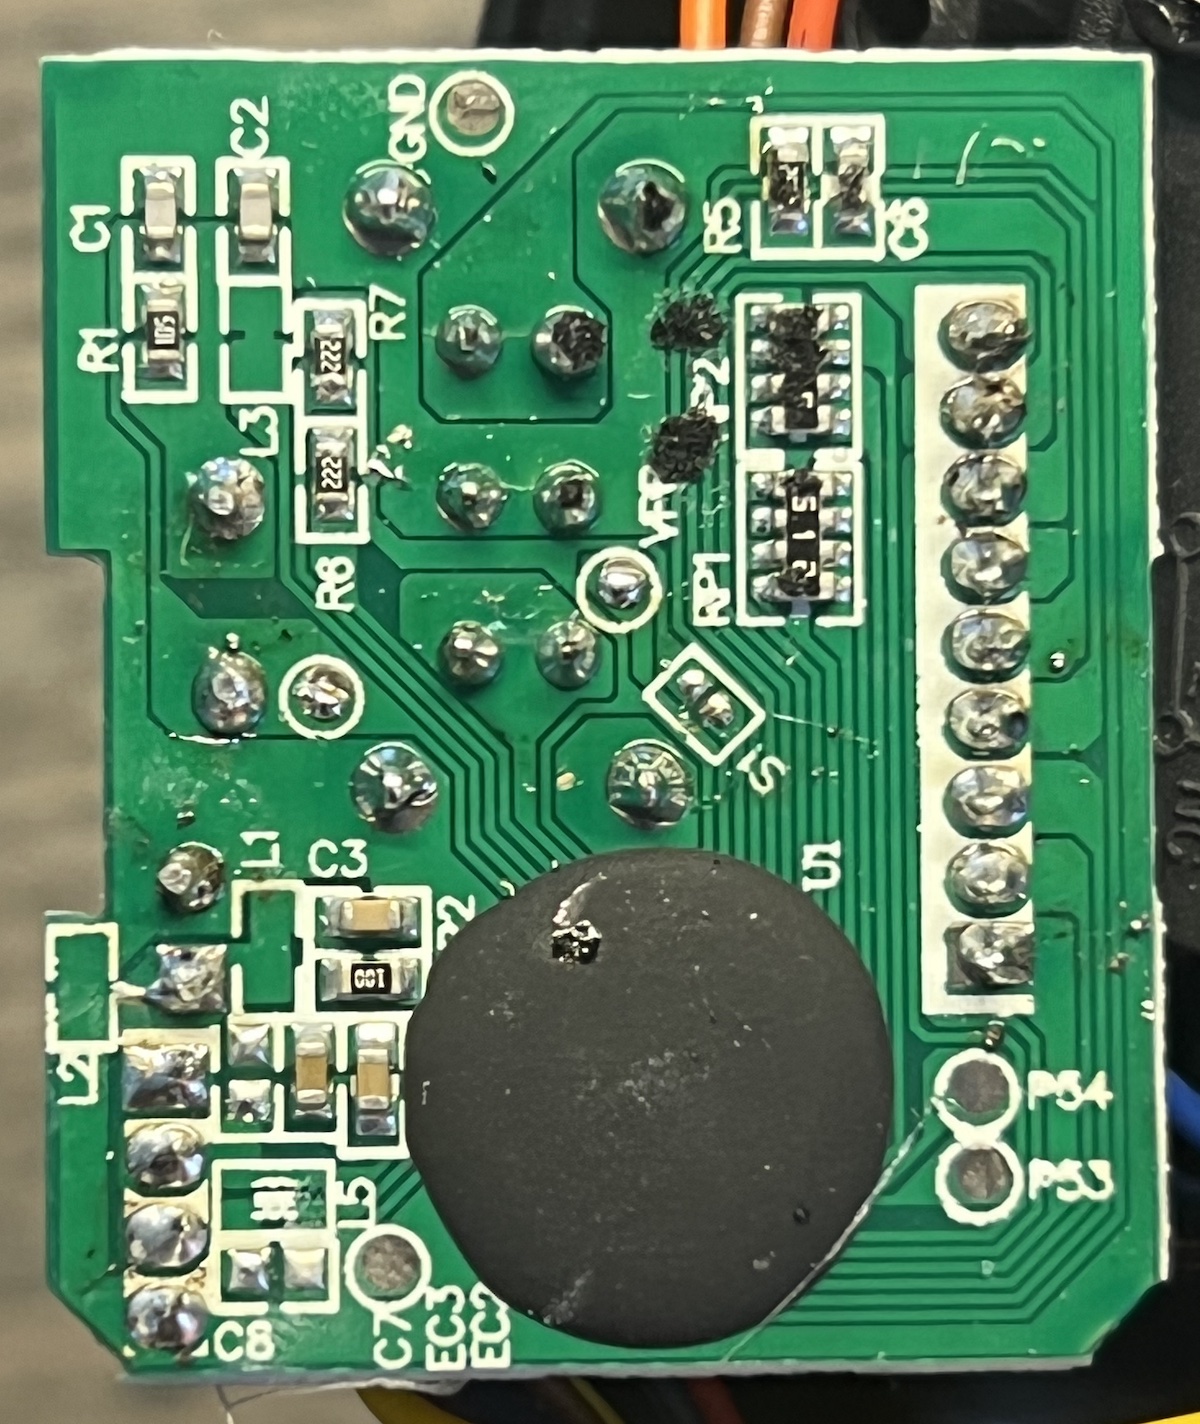 |
| Competition Pro Extra SL-650212-BKRD // V04T |
 |
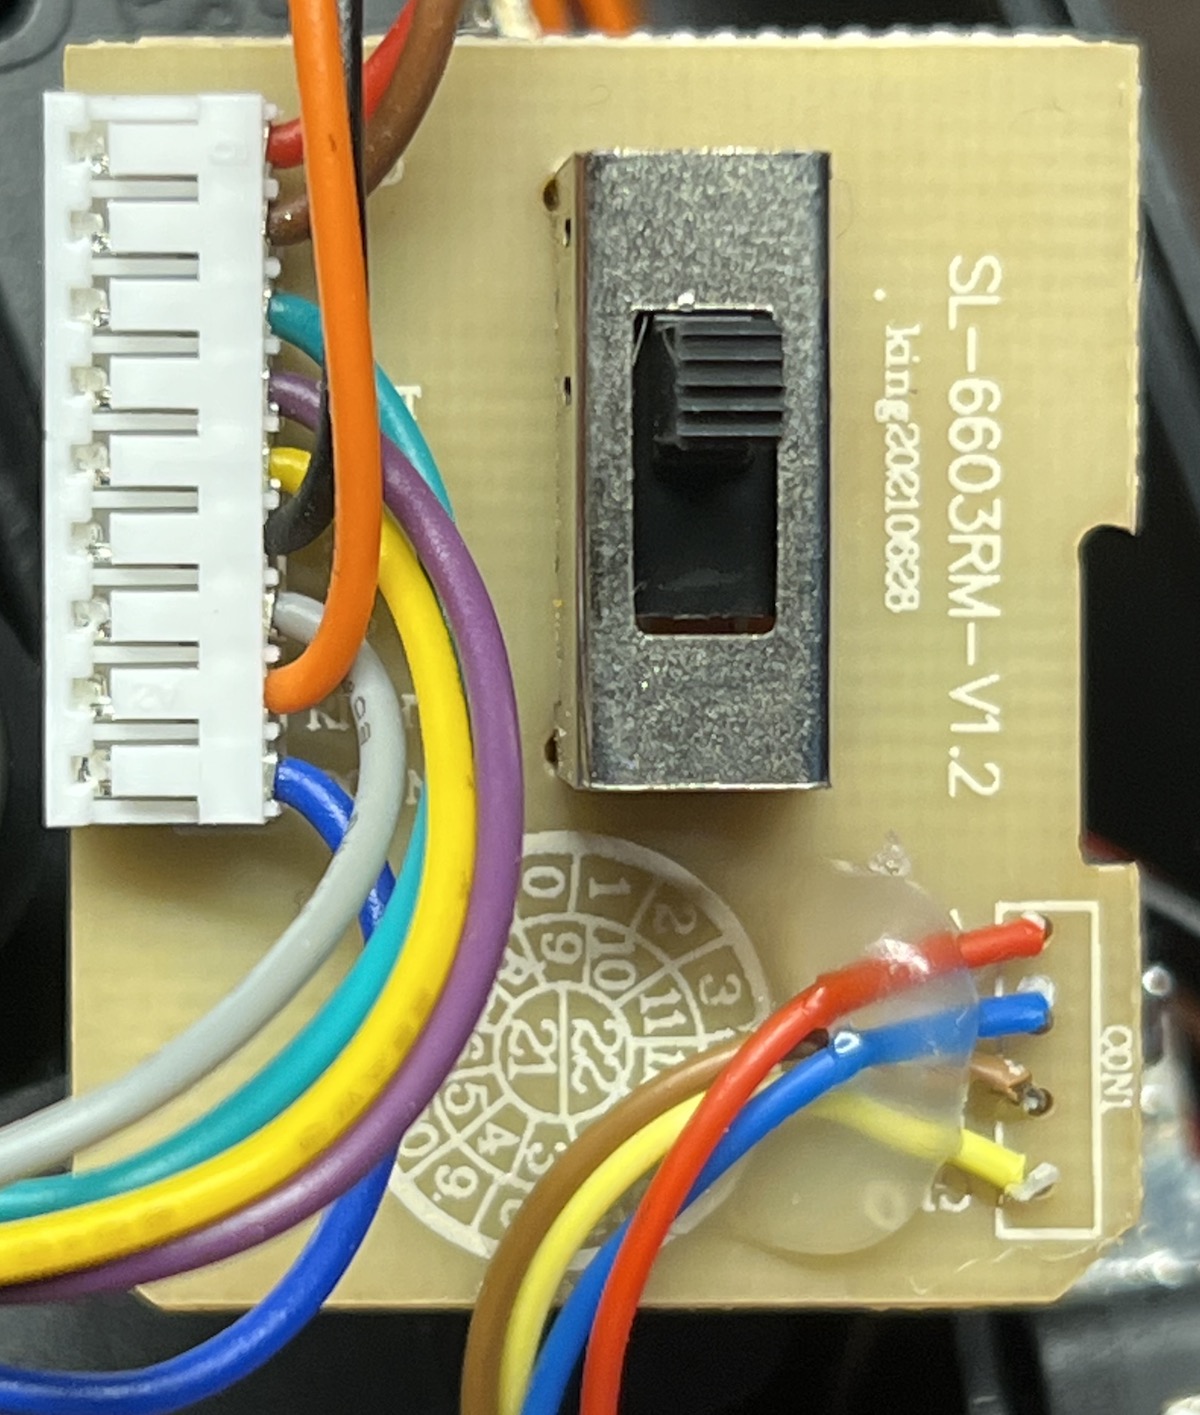  |
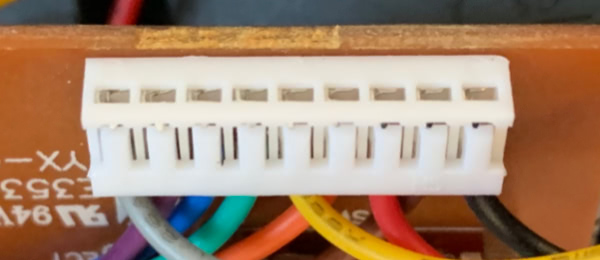
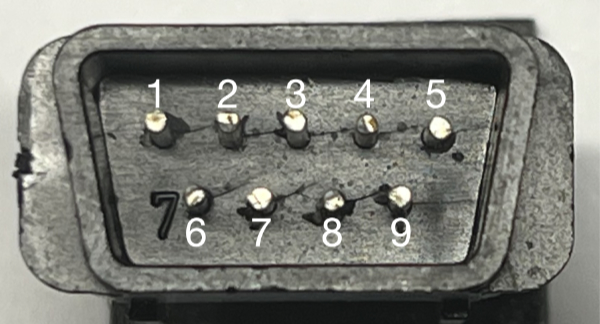
On all board versions, the inputs of the switches come in through this 9-pin connector (albeit with a different pinout and wire colors):
Converting this joystick into an C64/Amiga/Atari one is as easy as connecting the wires to a female DB9 plug.
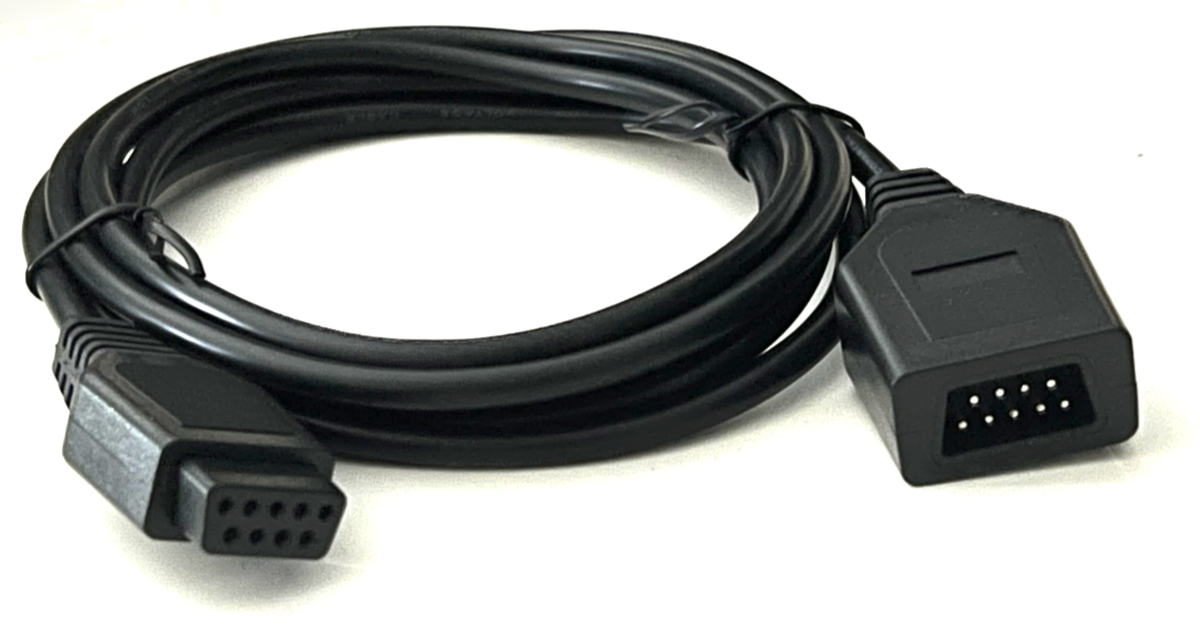
The Joystick Extension Cable
It is best to use a joystick extension cable and use the female connector and its wires. You can get these on common retail and auction websites. (Thanks Robert!)
You can open the housing of the male connector with a carpet knife to get to this:
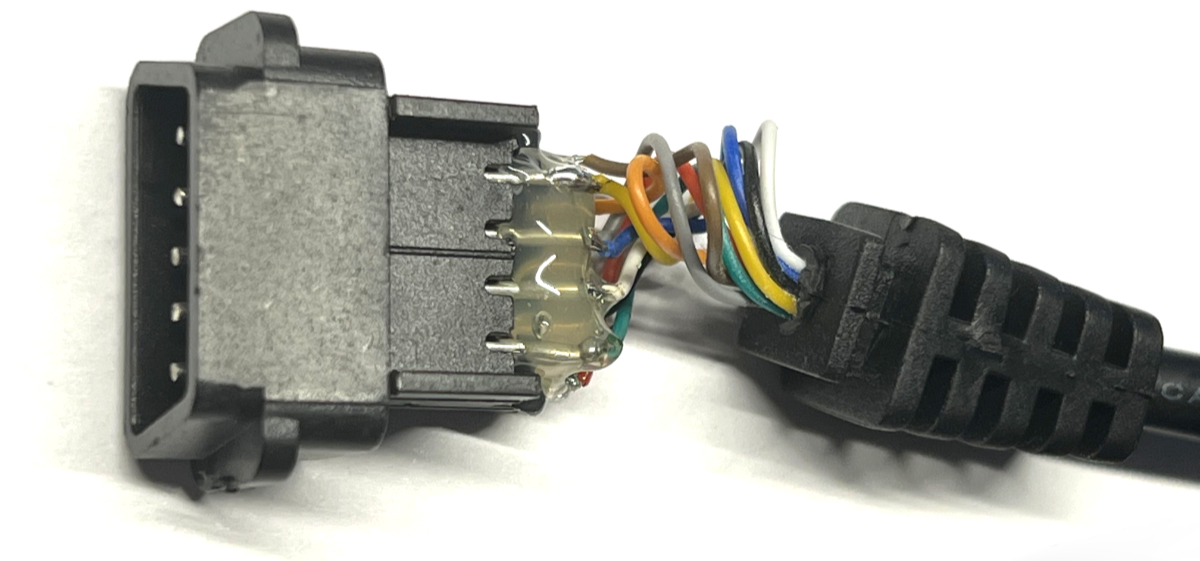
Before cutting the wires to the male connector, you can write down the mapping between pin numbers and wire colors. This is the mapping for my joystick extension cable, it may match yours:
| Pin | Color | Description |
|---|---|---|
| 1 | red | Up |
| 2 | black | Down |
| 3 | gray | Left |
| 4 | orange | Right |
| 5 | brown | (unused) |
| 6 | green | Button |
| 7 | white | (unused) |
| 8 | blue | GND |
| 9 | yellow | (unused) |
I currently have a huge amount of these cables, with exactly these wire colors, and I am happy to mail one (or more) to you for free within Europe. Reach out to mist64@mac.com/@pagetable.
In case you are using a different DB9 cable, here is the connector pinout:
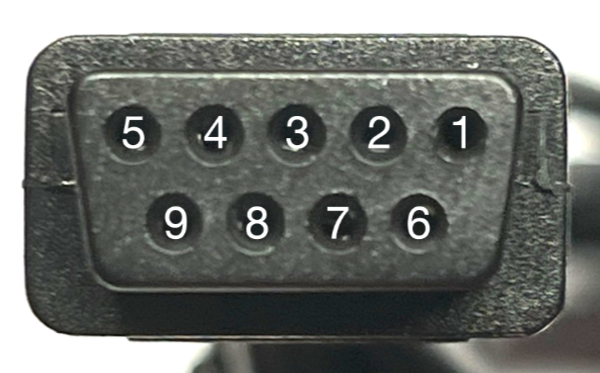
| Pin | Description |
|---|---|
| 1 | Up |
| 2 | Down |
| 3 | Left |
| 4 | Right |
| 5 | (unused) |
| 6 | Button |
| 7 | (unused) |
| 8 | GND |
| 9 | (unused) |
Competition Pro Pinouts
The following tables show the pinout of the connector inside the Competition Pro Extra, the corresponding DB9 pin and the wire color in my joystick extension cable.
This is the pinout of the Competition Pro SL-6602-TBE “Return of a Legend”:
| SL-6602-TBE CP Pin |
CP Color | Description | DB9 Pin | DB9 Extension Color |
|---|---|---|---|---|
| 1 | black/ white | GND | 8 | blue |
| 2 | gray | Button R2 | 6 | green |
| 3 | light blue | Button L2 | 6 | green |
| 4 | blue | Button R | 6 | green |
| 5 | green | Button L | 6 | green |
| 6 | yellow | Left | 3 | gray |
| 7 | orange | Right | 4 | orange |
| 8 | red | Down | 2 | black |
| 9 | brown | Up | 1 | red |
This is the “SL-6603-SBK” Competition Pro USB:
| 6603-SBK CP Pin |
CP Color | Description | DB9 Pin | DB9 Extension Color |
|---|---|---|---|---|
| 1 | brown | Up | 1 | red |
| 2 | red | Down | 2 | black |
| 3 | orange | Left | 3 | gray |
| 4 | yellow | Right | 4 | orange |
| 5 | green | Button L | 6 | green |
| 6 | purple | Button R | 6 | green |
| 7 | blue | Button L2 | 6 | green |
| 8 | gray | Button R2 | 6 | green |
| 9 | black/ white | GND | 8 | blue |
This is the pinout of the Competition Pro transparent, SPORTS TOURNAMENT and the KOKA Edition:
| transparent SPORTS KOKA CP Pin |
CP Color | Description | DB9 Pin | DB9 Extension Color |
|---|---|---|---|---|
| 1 | black | GND | 8 | blue |
| 2 | brown | Button R2 | 6 | green |
| 3 | red | Button L2 | 6 | green |
| 4 | orange | Button R | 6 | green |
| 5 | yellow | Button L | 6 | green |
| 6 | green | Right | 4 | orange |
| 7 | blue | Left | 3 | gray |
| 8 | purple | Down | 2 | black |
| 9 | gray | Up | 1 | red |
This is the no-suffix Competition Pro Extra (“Anniversary Edition”):
| no-suffix CP Pin |
CP Color | Description | DB9 Pin | DB9 Extension Color |
|---|---|---|---|---|
| 1 | gray | Left | 3 | gray |
| 2 | purple | Down | 2 | black |
| 3 | blue | Right | 4 | orange |
| 4 | green | Up | 1 | red |
| 5 | yellow | GND | 8 | blue |
| 6 | orange | Button L | 6 | green |
| 7 | red | Button R | 6 | green |
| 8 | brown | Button L2 | 6 | green |
| 9 | black | Button R2 | 6 | green |
This is the V2/V3 and the V04T Competition Pro Extra. (Note that the wire colors are the same between these two versions, it’s just the pin numbers that differ.)
| CP V2/V3 Pin |
CP V04T Pin |
CP Color | Description | DB9 Pin | DB9 Extension Color |
|---|---|---|---|---|---|
| 1 | 3 | blue | Up | 1 | red |
| 2 | 6 | orange | Left | 3 | gray |
| 3 | 1 | gray | Down | 2 | black |
| 4 | 9 | black | Button R2 | 6 | green |
| 5 | 5 | yellow | Button L2 | 6 | green |
| 6 | 2 | purple | Right | 4 | orange |
| 7 | 4 | green | Button L | 6 | green |
| 8 | 8 | brown | Button R | 6 | green |
| 9 | 7 | red | GND | 8 | blue |
The joystick has 4 buttons, but basic DB9 joysticks only support one button. In the tables above, all buttons are wired to the DB9 button pin.
Dual-Port: USB and DB9
There are several ways you can make the connections. One is to stick the DB9 wires into the side of the connector, then glue them:
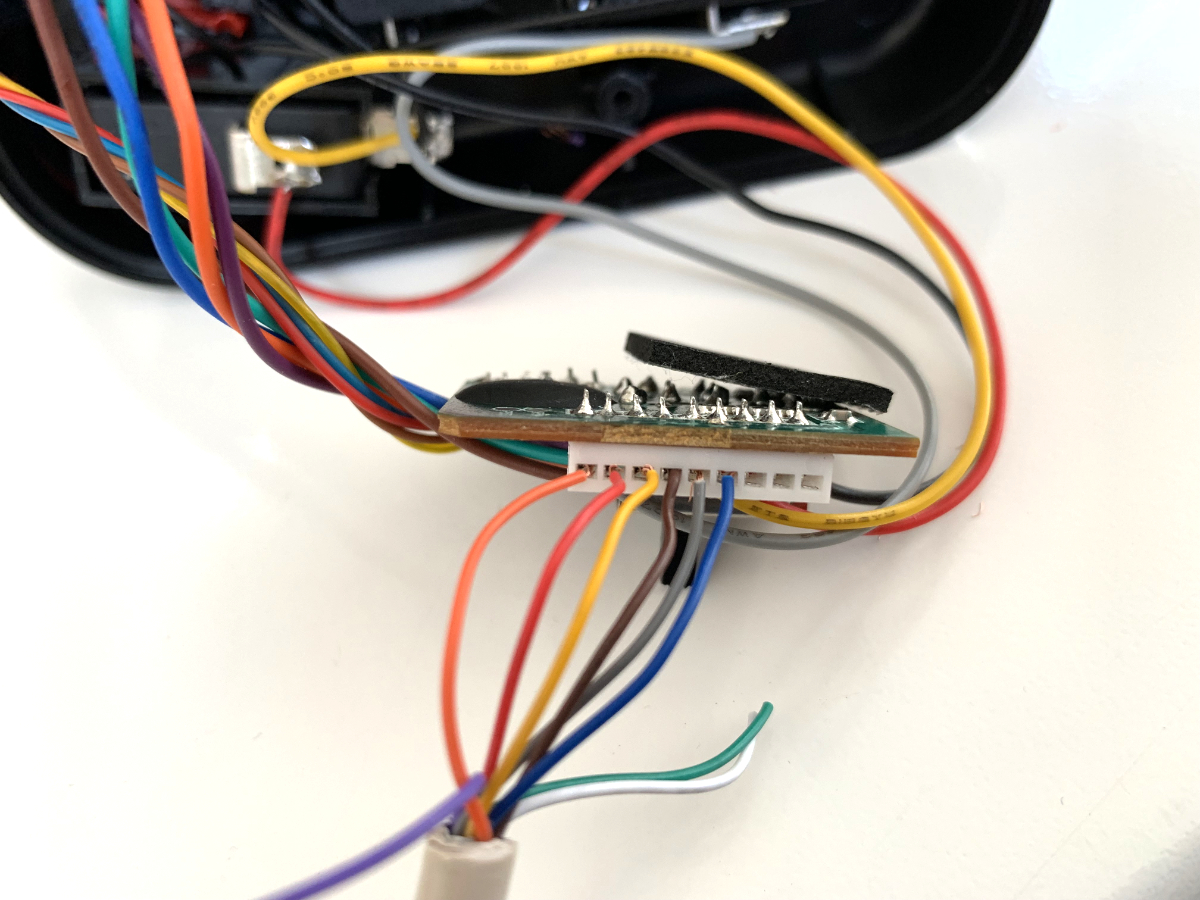
Or you could solder the wires to the other side of the PCB.
The wires for the USB port do not have to be disconnected: As long as the circuitry is not powered through the USB plug, it is completely passive, so you can use the joystick with either of the two connectors!
DB9 Joystick
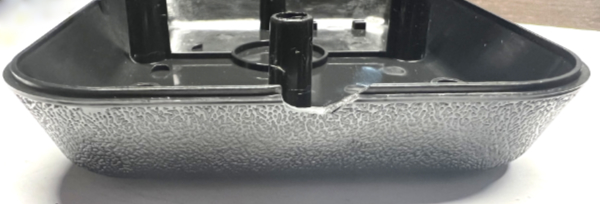
The other option is to remove the USB board and connect the wires from the switches directly to the wires of the joystick extension cable. The strain relief at the end of the joystick cable is a little too big though…
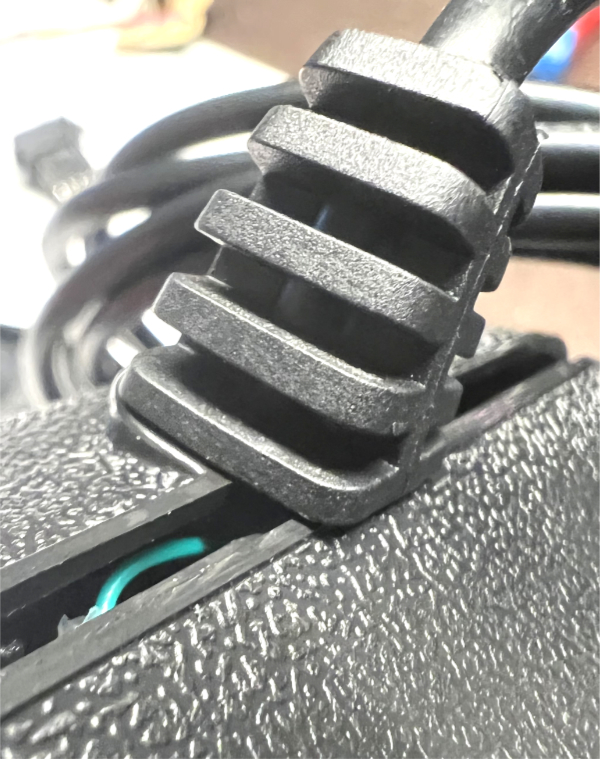
…so you will have to cut a small notch into the bottom plastic:
In the end, you’ll have a real DB9 Competition Pro!
Bonus: DB9 to USB Adapter
You can use a male DB9 plug (e.g. from the joystick extension cable, or a RS-232 plug like in the picture) and the USB board to build a DB9 to USB adapter:
Through the adapter, you will lose access to the four individual buttons, though.
Limitations
The rapid fire functionality is lost, since it’s part of the USB board. The RapidFire project is one solution to re-add this feature.
Community
If you encounter a different article number, suffix, USB board version or wire color coding, or have a joystick extension cable with different wire colors, please reach out, and I’ll update this article!
Photos of the boards of the following versions would be very much appreciated:
- SL-6603-GOLD
- SL-6603-SPORTS (not: -DE)
- SL-6603-SPORTS-EU
Atari joystick extension cables are a good source for compact D-sub connectors without screws. The cables are fairly common on the big retail/auction sites. The compact connector is a must for some Amiga models. The connectors on the A2000 are recessed, so many DB9 connectors with screws foul on the case.
Excellent idea. I’ve ordered some extension cables, and will update the article with the results.
Thank you was great help but my wires at joystick are different colours – orange = left, purple = right, blue = up, grey = down, left button = green, right button = brown, earth to all = black. Your joystick pic shows earth to black also so ? very strange as connector at usb board we are both the same.
looks like black gnd but must go to grey somewhere
Just received 2 usb versions as well as atari cables to change db9 connection there to use with real c64, so usb can be discarded. Looks like quick and easy to do, but how about the autofire (small switch in the back)?
I suppose it does not work passively with only the signal wires connected via the tiny pcb inside the joystick? I can supply the pcb with +5V & gnd from joyport, but did somebody already research from where to pick the “autofired” fire signal and how to feed it to fire pin of the joy port? I think autofire works independently of the usb-chip, even when usb data is not transmitted to disconnected data pins. Maybe some simple components need to be added or just a correct connection point?
Last thing I remember is that autofire was just a cap soldered in parallel with the switch. The joystick port “reads” if the input is closed or open, it’s connected to the keyboard, so there should be an intermitted (block)-signal on each pin, 5V with a very low current on each pin, except for the ground, so when a switch is pressed this signal is connected to ground. Using a cap will charge/discharge. With a block signal, this is like flipping a switch on/off all the time, resulting in autofire.
Why aren’t you just removing the USB PCB and wiring the DB9 cables directly to the switches ?
That is what I intend to do in the coming days…
On an Amiga here, I followed the wiring diagram, actually connected directly to the switch wires and removed the USB cable. While all the connections check out with a meter, and it plays, it will frequently “pause” the game, I have to hit return to make it start again (Turbo Santa), and other somewhat strange behavior. Next step is to remove the circuit board entirely in case it is causing some kind of signal noise, but I’m very frustrated at this point. LOL
Great! Twenty years ago I converted dozens of Competition Pro joysticks first to PC Gameport and later to USB. And now it’s going the other way….
🙂
Hi! I have bottom label and USB board pictures of SL-6603-TWT Transparent “Game-Collection” Edition. Where to sent them to get posted those in here?
….or buy a DB9 competition pro joystick from eBay, that is more solidly built, with a choice of either leaf or microswitch fire buttons. They’re not too expensive, bullet proof, microswitches of generally better quality. Ensure the model your buying has a rubber that isn’t too stiff if you buy an older one – the more recent ‘extra’ ones have the spring inside and microswitch fire buttons like the speedlink usb version.
The funny thing is – if the USB-to-9PIN adapters “RYS MK II” and “TOM” would also support the newer SL-650212-BKRD versions of the “USB Competition Pro” and not only all the older models of this joystick (which is the case sadly), then there would be no need at all anymore, for such a hardware-modification here. And then the joystick could also be used on both, PC and C64/Amiga at the same time, only one of these adapters must be bought.
This would be the best solution. But i don’t know, why the manufacturers of these adapters, sadly do not install the support for the new model of this joystick, for years? They are good adapters, but the support for both, is not really good.
Now, when users had made this described hardware-modification on their joystick, then it needs another adapter again, when they still want to use this joystick on the PC then. Same problem, only the other way around and you still have to make the hardware modification too. Advantage is, that there are several of such adapters, which allow to connect 9Pin joysticks to USB (9PIN-to-USB), and they will probably support the converted joystick then, while the USB-to-9PIN adapters do not. 🙂
The newer usb comp pro’s are not as good quality as the vintage ones, which are still plentiful on eBay (other marketplaces are available). So much better pick up an original, some great examples out there
That may be true for the older “USB Competition Pro Extra” modell, but not for the newer Anniversary Edition. I have such a Anniversary modell in heavy use since two years and no problems at all, so far.
Sobha Aurum in Sector 36, Greater Noida is an exclusive luxury high‑rise spanning ~3.5 acres with two elegant towers . It hosts 2–4 BHK apartments (~1,200–2,200 sq ft), a resort‑style clubhouse, infinity pool, gym, sports courts, landscaped gardens, smart‑home features, and eco‑friendly systems.
At Taj Voyages Tour, we strive to create memorable travel experiences that exemplify the richness of India’s history, culture, and natural beauty. With a keen emphasis on Agra, where the world-renowned Taj Mahal is located, our tours aim to offer tourists comfort, genuineness, and one-on-one service..
Be it a Same Day Agra Tour through Gatimaan Express, a Golden Triangle experience over multiple days, or a tailor-made heritage tour, every aspect is well taken care of by our team — from logistics and expert guides to tasty food and hassle-free arrangements.
Our purpose is straightforward: to make your India visit special, hassle-free, and unforgettable. As seasoned professionals in the travel sector, we pride ourselves on providing carefully designed tours that combine luxury, heritage, and hospitality.
Taj Voyages Tour – Your go-to expert for visiting India’s ageless marvels.