I have this pile of broken GEOS disks that were sent in for replacements. In two previous articles (1, 2), I explored the reasons why the disks broke. Now let’s be constructive: Can we reconstruct the original bits by combining the correct parts? This article shows how it is possible with the help of a small tool that combines the good parts of several broken disk images.
Overview
The original disk set consisted of four double-sided disks. Of my 50 disks, this is the distribution:
- 21x Disk 1/4: System
- 18x Disk 2/4: Backup
- 7x Disk 3/4: GeoSpell
- 4x Disk 4/4: Drivers
I have created a command line tool to help analyze images of multiple copies of commercial disks:
https://github.com/mist64/combine_d64
Let’s use it to reconstruct the original bits! The remaining sections are sorted according the complexity of the reconstruction of the despective disk side:
Disk 1B: Applications
Running the tool on all images of the B side of the first disk (“Applications”) will find two identical copies:
$ combine_d64.py *.d64

The following images are identical:
05b.d64 14b.d64
And indeed, the reverse sides conain the original unchanged data.
GEOS disks 1 and 2 are specially mastered for copy protection purposes: When looking at the raw bits on disk, the gaps between sector headers and the sector data contain a signature that cannot be reproduced by an unmodified 1541 drive, and that will be destroyed whenever writing a sector.
The tool g64conv converts .G64 files into a textual representation that is easy to analyze. This is what a sector with its header and data section looks like in g64conv’s text format:
   sync 18
   ; header
   gcr 08
   begin-checksum
      checksum 0f
      ; sector
      gcr 00
      ; track
      gcr 01
      ; id2
      gcr 44
      ; id1
      gcr 4a
   end-checksum
   gcr 0f
   gcr 0f
   ; Trk 1 Sec 0
   bytes 55 55 55 67 55 55 55 67
   bits 111111

   sync 18
   ; data
   gcr 07
   begin-checksum
      gcr 00 ff 00 ff 00 ff 00 ff 00 ff 00 ff 00 ff 00 ff 00 ff 00 ff 00 ff 02 0e 00 ff 02 04 00 ff 11 0b 00 ff 00 ff 00 ff 11 12 00 ff 00 ff 00 ff 00 ff 00 ff 00 ff 00 ff 00 ff 00 ff 00 ff 00 ff 00 ff 00 ff 00 ff 00 ff 00 ff 00 ff 00 ff 00 ff 00 ff 00 ff 00 ff 00 ff 00 ff 00 ff 00 ff 00 ff 00 ff 00 ff 00 ff 00 ff 00 ff 00 ff 00 ff 00 ff 00 ff 00 ff 00 ff 00 ff 00 ff 00 ff 00 ff 00 ff 00 ff 00 ff 00 ff 00 ff 00 ff 00 ff 00 ff 00 ff 00 ff 00 ff 00 ff 00 ff 00 ff 00 ff 00 ff 00 ff 00 ff 00 ff 00 ff 00 ff 00 ff 00 ff 00 ff 00 ff 00 ff 00 ff 00 ff 00 ff 00 ff 00 ff 00 ff 00 ff 00 ff 00 ff 00 ff 00 ff 00 ff 00 ff 00 ff 00 ff 00 ff 00 ff 00 ff 00 ff 00 ff 00 ff 00 ff 00 ff 00 ff 00 ff 00 ff 00 ff 00 ff 00 ff 00 ff 00 ff 00 ff 00 ff 00 ff 00 ff 00 ff 00 ff 00 ff 00 ff 00 ff
      checksum 13
   end-checksum
   gcr 00
   gcr 00
   bytes 55 55 55 67 55 55 55 67
   bits 111111
The 55 55 55 67 55 55 55 67 bytes after the header and after the data are the copy protection signature. The following small shell script will count the number of sectors that don’t have the signature and have therefore been written to:
perl g64conv 15b.g64 15b.txt
cat 15b.txt |
  grep Trk -A 1 | tr '\n' 'X' |
  sed -e "s/X   bytes/;   bytes/g" |
  tr 'X' '\n' |
  grep Trk |
  grep -v "55 67$" |
  cut -d ";" -f 2 |
  wc -l
Disks 05b and 14b carry the original bits, so we’re done with these. Note that even though we ran the tool on the .D64 image, we have to take the low-level .G64 image with all the original bits for the copy protection to work.
Disk 3B: GeoSpell (English)
Running the tool on all copies of the B side of the third disk will tell us that it found identical copies – but two sets of them!
$ combine_d64.py *.d64

The following sets of images are identical:
0 : 42b.d64 45b.d64
1 : 44b.d64 46b.d64
The tool cannot decide which of the two sets – if any – carries the original data. Let’s look at a diff:
323c323
< 00014f0 c6 20 d0 f1 a4 21 c8 a9 00 91 00 60 ac 89 84 b9
---
> 00014f0 c6 20 d0 f1 a4 21 c8 01 01 01 01 01 01 01 01 01
659c659
< 00029f0 d0 07 a2 80 2c 03 82 30 1b 20 12 39 a5 15 f0 06
---
> 00029f0 d0 07 a2 80 2c 03 82 01 01 01 01 01 01 01 01 01
995c995
< 0003ef0 18 65 08 85 08 90 02 e6 09 a5 09 85 19 a5 08 85
---
> 0003ef0 18 65 08 85 08 90 02 01 01 01 01 01 01 01 01 01
[...]
The second set has the last bytes of the last sector of each track replaced by a series of 0x01 characters. Also, all these sectors have checksum errors.
Looking at the g64conv textual representation shows what’s going on:
[...]
   sync 16
   ; data
   gcr 07
   begin-checksum
      gcr 01 07 04 [...] a4 21 c8
   bits 11111
;   block aborted2
   bits 111

end-track
The last sector of each track is aborted. And we have two physical disks with the exact same issue – this was a problem in commercial disk duplication! The motor of the copying machine was probably spinning too slowly, so when a full rotation was complete, it stopped writing before it was done with all the bits of the track. This was probably the reason the disk was sent in for a replacement!
So we know that the B sides of disks 44 and 46 are broken. Except for the truncated sectors, the data was the same as on the two identical disks 42b and 45b, which gives us high confidence that these contain the correct data.
Disk 4B: More Drivers
For the copies of the B side of the fourth disk we don’t have two identical images:
$ combine_d64.py *.d64

All blocks had at least 3 copies.
Every block of the following images is also contained in at least one other file:
48b.d64
But there is one image, 48b, where for every block, there are at least two other images that have the same data at this position. This gives us high confidence that the data in 48b is correct.
Disk 4A: Drivers
It is a little more tricky with the A side of the fourth disk:
$ combine_d64.py *.d64

The following blocks only had a limited number of copies:
2 copies of block 125 (Trk 6 Sec 20) in 48a.d64 51a.d64
2 copies of block 357 (Trk 18 Sec 0) in 48a.d64 50a.d64
2 copies of block 358 (Trk 18 Sec 1) in 48a.d64 50a.d64
Every block of the following images is also contained in at least one other file:
48a.d64
48a is a candidate, but there are three blocks for which only two other copies have been found.
As it turns out, disk 50a has the same duplication error as 44b and 46b, the last sector of every track is truncated. If we fill the broken bytes, disk 50a is actually identical with 48a, so we can be very confident that 48a is correct.
Disk 3A: GeoSpell (German)
But there are also some cases where none of the images seems to be completely correct:
$ combine_d64.py *.d64

All blocks had at least 3 copies.
The result was combined from the following images:
41a.d64 (667 blocks)
42a.d64 (16 blocks)
In this case, the likely result had to be combined from two images.
If we look at the images closely, we can see that 41a, 43a, 44a and 46a all have the duplication error. Nevertheless, it could source most of the correct sectors from 41a. That’s because it’s the first argument we gave it. If we changed the order of the arguments so that 41a is last, we get this:
All blocks had at least 3 copies.
The result was combined from the following images:
42a.d64 (682 blocks)
43a.d64 (1 blocks)
All blocks except one come from 42a. That’s the single block of 42s with a read error. All other images contain the the correct copy of it, so we can be very confident that by fixing the sector, we get a correct image.
Disk 2B: Write Utilities
For the next disk, we tool doesn’t give us as much confidence:
$ combine_d64.py *.d64

The following blocks only had a limited number of copies:
2 copies of block 297 (Trk 15 Sec 3) in 28b.d64 36b.d64
The result was combined from the following images:
22b.d64 (675 blocks)
23b.d64 (6 blocks)
24b.d64 (1 blocks)
28b.d64 (1 blocks)
Again, the resulting had to be combined from several images. This time, it had to use 4 images in order to combine them to the resulting image, which looks suspicious. But that is just be a side effect of the ordering of the files as we passed it to the tool. By putting 36 and 37 first, we get this printout:
The following blocks only had a limited number of copies:
2 copies of block 297 (Trk 15 Sec 3) in 36b.d64 28b.d64
The result was combined from the following images:
36b.d64 (679 blocks)
37b.d64 (4 blocks)
Note that the resulting image is of course the same. Experimenting with the ordering is useful though, because we can now have a look at the diff between 36b and the result to see whether things look sane.
But this example teaches us that the majority is not always right. All sectors of 36b carry the “55 67” signature and are unmodified. The app GeoMerge on this disk has never been started – on the other images, it has, which didn’t only stamp in the system’s serial number (track 15 sector 3), but also change 3 other sectors deterministically.
So the answer is: 36b.
Disk 1A: System
We have lots of copies of the boot disk, but two blocks that only have two identical copies:
$ combine_d64.py *.d64

The following blocks only had a limited number of copies:
2 copies of block 358 (Trk 18 Sec 1) in 05a.d64 14a.d64
2 copies of block 400 (Trk 20 Sec 5) in 14a.d64 17a.d64
The result was combined from the following images:
01a.d64 (638 blocks)
03a.d64 (38 blocks)
04a.d64 (1 blocks)
05a.d64 (4 blocks)
12a.d64 (1 blocks)
14a.d64 (1 blocks)
Track 20 sector 5 is where the GEOS serial number is stored on the boot disk. Similarly to apps, the serial number is 0 on a new system disk, and a random one will be picked on first boot – and also copied to the backup boot disk. Again, the serial numbers are different on all disks.
$ for i in *.d64; do hexdump $i | grep 00190c0; done
00190c0 b8 50 bf aa 60 1d 06 ff a0 93 d0 0a a0 90 d0 06
00190c0 b8 50 bf aa 60 2f c5 ff a0 93 d0 0a a0 90 d0 06
00190c0 b8 50 bf aa 60 23 8d ff a0 93 d0 0a a0 90 d0 06
00190c0 b8 50 bf aa 60 cd ea ff a0 93 d0 0a a0 90 d0 06
00190c0 b8 50 bf aa 60 27 69 ff a0 93 d0 0a a0 90 d0 06
00190c0 b8 50 bf aa 60 3e 35 ff a0 93 d0 0a a0 90 d0 06
00190c0 b8 50 bf aa 60 86 a1 ff a0 93 d0 0a a0 90 d0 06
00190c0 b8 50 bf aa 60 05 3f ff a0 93 d0 0a a0 90 d0 06
00190c0 b8 50 bf aa 60 d7 31 ff a0 93 d0 0a a0 90 d0 06
00190c0 b8 50 bf aa 60 6d dd 00 a0 93 d0 0a a0 90 d0 06
00190c0 b8 50 bf aa 60 22 f8 ff a0 93 d0 0a a0 90 d0 06
00190c0 b8 50 bf aa 60 00 00 00 a0 93 d0 0a a0 90 d0 06
00190c0 b8 50 bf aa 60 fa 27 ff a0 93 d0 0a a0 90 d0 06
00190c0 b8 50 bf aa 60 57 ff ff a0 93 d0 0a a0 90 d0 06
00190c0 b8 50 bf aa 60 00 00 00 a0 93 d0 0a a0 90 d0 06
00190c0 b8 50 bf aa 60 4e c9 ff a0 93 d0 0a a0 90 d0 06
Disk 14a is one of the two with a serial number of 0. Since this is a GEOS boot disk, we can look for the “55 67” signature to check which sectors have ever been written. And we’re lucky: Disk 14a has all original sectors intact, so we’re done!
Disk 2A: Backup
The serial number is also an issue on the set of backup disks:
$ combine_d64.py *.d64

For the following blocks, no duplicates exist:
400 (Trk 20 Sec 5)
Every image has a different serial number – but this time, none has a 0.
$ for i in *.d64; do hexdump $i | grep 00190c0; done
00190c0 b8 50 bf aa 60 82 d2 ff a0 93 d0 0a a0 90 d0 06
00190c0 b8 50 bf aa 60 1a 35 ff a0 93 d0 0a a0 90 d0 06
00190c0 b8 50 bf aa 60 86 a1 ff a0 93 d0 0a a0 90 d0 06
00190c0 b8 50 bf aa 60 9a 50 ff a0 93 d0 0a a0 90 d0 06
00190c0 b8 50 bf aa 60 07 bd ff a0 93 d0 0a a0 90 d0 06
00190c0 b8 50 bf aa 60 dd 21 ff a0 93 d0 0a a0 90 d0 06
00190c0 b8 50 bf aa 60 95 0c ff a0 93 d0 0a a0 90 d0 06
00190c0 b8 50 bf aa 60 2f c5 ff a0 93 d0 0a a0 90 d0 06
00190c0 b8 50 bf aa 60 aa af ff a0 93 d0 0a a0 90 d0 06
00190c0 b8 50 bf aa 60 1d 06 ff a0 93 d0 0a a0 90 d0 06
00190c0 b8 50 bf aa 60 9a 27 ff a0 93 d0 0a a0 90 d0 06
00190c0 b8 50 bf aa 60 fa 27 ff a0 93 d0 0a a0 90 d0 06
00190c0 b8 50 bf aa 60 dd f0 ff a0 93 d0 0a a0 90 d0 06
00190c0 b8 50 bf aa 60 bd 2b ff a0 93 d0 0a a0 90 d0 06
00190c0 b8 50 bf aa 60 cd ea ff a0 93 d0 0a a0 90 d0 06
00190c0 b8 50 bf aa 60 23 8d ff a0 93 d0 0a a0 90 d0 06
00190c0 b8 50 bf aa 60 19 c0 ff a0 93 d0 0a a0 90 d0 06
00190c0 b8 50 bf aa 60 e7 04 ff a0 93 d0 0a a0 90 d0 06
Again, we can use the “55 67” signature to check which image has the fewest changed sectors: Disks 22a, 35a and 36a all only have a single changed sector: the one with the serial number. So we can manually reconstruct the correct image by changing the serial number and the flag following it to “00 00 ff”. This is best done in the g64conv .TXT file, where we can also patch the signature back in.
Conclusion
It was possible to recreate the original masters. The GEOS serial number system made things more complicated than it should have been, but the copy protection signature then made things a lot easier again!
Here are the GEOS 2.0 German master disk images:
geos20de_master.zip (902 KB)
GEOS 64 2.0
Seite A: Systemdiskette / Seite B: Applikationen
Seriennummer: nnnnnnnnn
Copyright by Berkeley Softworks 1988
Bestell-Nr. 51677 – Diskette 1 von 4 / nnnnnnnnxx
GEOS 64 2.0
Seite A:Sicherungssystem / Seite B:Write Utilities
Copyright by Berkeley Softworks 1988
Floppy 1541/1570/1571 – Diskette 2 von 4
Bestell-Nr. 51677 / nnnnnnnnxx
GEOS 64 2.0
Seite A:GeoSpell (deutsch) / Seite B:GeoSpell (engl)
Copyright by Berkeley Softworks 1988
Floppy 1541/1570/1571 – Diskette 3 von 4
Bestell-Nr. 51677 / nnnnnnnnxx
GEOS 64 2.0
Seite A: Treiber / Seite B: Weitere Treiber
Copyright by Berkeley Softworks 1988
Floppy 1541/1570/1571 – Diskette 4 von 4
Bestell-Nr. 51677 / nnnnnnnnxx
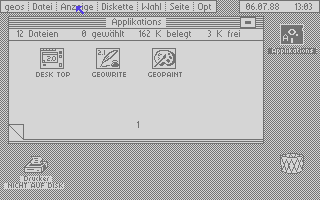
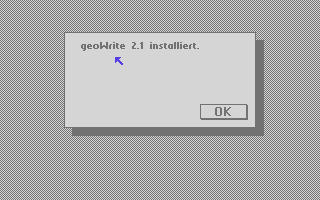
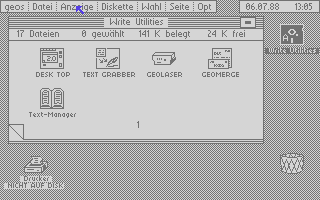
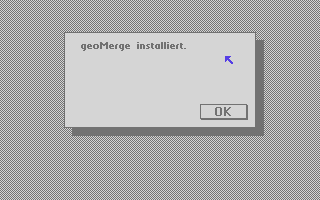
When first using them, you will have to go through the regular installation process, pictured below:

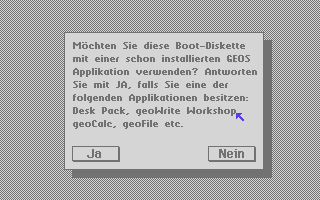

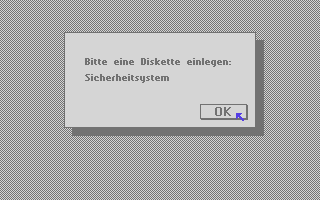
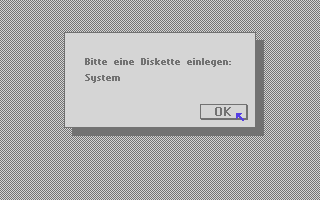
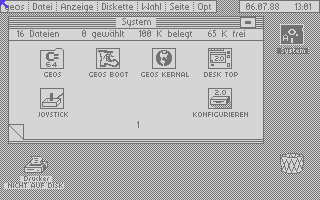
And here is a video of the install process:

Oh, it’s possible that I had a GeoSpell (or was it GeoMerge?) disk that was affected by the duplication problem, as the disk never worked for me from the start, and I seem to recall that the problem I was running into was not uncommon. Probably it was mentioned in 64er at some point?
But the memory on this is very blurred, so it could have been something else entirely. I never sent the disks in. I probably still have them, but in a cardboard box ~5000 miles away. If I ever think of it, I might look at them.
I will keep reminding you then!
could you also do English disks?
I would love to, but I’d need a collection of disks for this. Maybe there are enough .G64 images of different disks on the web.
The geos20de_2a.g64 in the archive geos20de_master.zip is damage. This can bee seen in the file size 😉 . Normaly the disk “Sicherheitsystem” is a 1:1 copy of the disk “System”. Only the disk name differ.
I have it tested in WinVice. The installation works without problems, but geos20de_2a.g64 do not boot after installation.
Is there a possibility to get flux dumps of the intact disks – especially Disk 42?
there might be a possibility that a flux dump explains why GeoMerge is reported to fail to install on some floppies.
Devices like SuperCard Pro, GreaseWeazle V4, Kryoflux and other are able to create such dumps.
I am comparing the German version with the English version.
It seems they also changed the keyboard in the German version.
But some German characters can not be entered from the keyboard.
I’m using the Vice emulator.
Do you know where I can find the manual that comes with this German version?