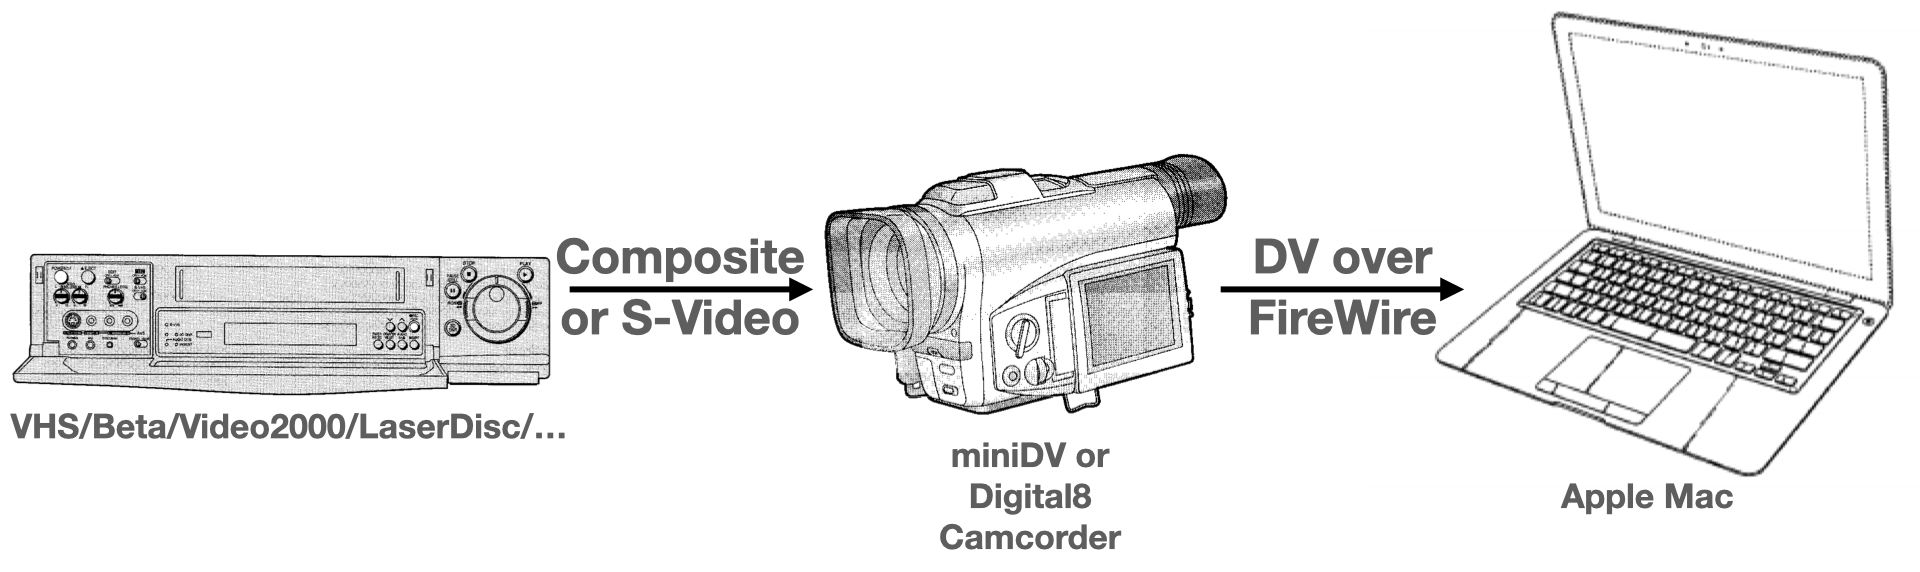
This article explains a setup and workflow for digitizing analog video (e.g. VHS, Beta, Video 2000, LaserDisc, …) using a Mac and digital camcorder – in high quality and with interlacing intact; optimized for archival. We will use a old-school digital camcorder (they are cheap!) to convert the analog signal to a high-quality digital “DV” stream and then record the DV stream on a Mac using a FireWire connection.
The Problem with Interlaced Video
Standard definition analog video is either
- 576i50 (PAL/SECAM): 25 full frames per second of 720×576 pixels, interlaced
- 480i60 (NTSC): 30 full frames per second of 720×480 pixels, interlaced
Interlaced means that every full frame is split into two “fields”, one with the picture’s 288 (PAL; NTSC: 240) odd lines, and one with the 288 (240) even lines. These two fields can represent one moment in time: When combining them, they will give 25 (30) full 720×576 (720×480) frames. Or they can be recorded 1/50 (1/60) second apart, giving motion at a resolution of 50 (60) Hz, but at half the vertical resolution, and with the set of lines alternating every time.
Interlaced video was natural for old CRT displays, but in order to show interlaced video on modern displays or encode them into modern video compression formats, they need to be converted into progressive format, i.e. deinterlaced.
The two fields are always transmitted one after the other, and it is unclear whether every two fields should be combined (“comb filter”) for a 25 (30) Hz video or whether the 50 (60) fields should be vertically upscaled for a 50 (60) Hz video. Using the wrong method means either combing artifacts or flickering.
The worst part is when the pairing of fields is inconsistent, like in this example of Futurama or whenever two scenes are composited in the original SD version of Star Trek TNG.
So deinterlacing is hard, especially if you want to do it well. When digitizing analog video, it is best to keep the interlacing intact. When playing the file, VLC for instance will already do pretty good deinterlacing by default – and tomorrow’s VLC will certainly do a better job. And if you come back to the footage years later to share it or reuse parts in an HD video, you can use the best deinterlacer available then!
So all in all, if you want to archive analog video, you should keep it interlaced. Many simple solutions won’t do this, but this solution does.
Digital Video and DV
A full, uncompressed digital representation of a PAL signal is 50 times a second a 720×576 image at 24 bits per pixel, which is 25x720x576x24: almost 240 Mbits/sec.
This implies “4:4:4”, meaning every 2×2 pixels have four brightness values (Y’) and four values each for the two color components (Cb and Cr). Most digital formats use chroma subsampling, meaning that a 2×2 pixel grid has fewer chroma values. Since the human visual system is less sensitive to color than it is to brightness, 4:2:2 (half horizontal chroma resolution) is practically indistinguishable from 4:4:4.
The 1986 D-1 format uses 4:2:2 chroma subsampling and thus reduces the data rate by a factor of 1.5 to about 160 MBits/sec. Sony’s 1993 Digital Betacam additionally uses lossy compression to reduce the data rate by a factor of 2.34:1 down to about 70 MBits/sec. Both formats were meant for professional use.
The consumer format for digital SD camcorders is the 1994 DV (“Digital Video”). It uses 4:2:0 chroma subsampling (one color value per 2×2) for PAL and 4:1:1 (one color value per 4×1) for NTSC, which reduces 4:4:4 data by a factor of 2. The resulting data is lossily DCT-compressed by a factor of 5, leading to a data rate of 25 MBit/sec.
DV embeds an uncompressed 48 kHz 16 bit stereo PCM audio stream, which adds 1.5 MBit/sec (or alternatively, two 32 kHz 12 bit stereo streams with the same total bitrate).
Unlike today’s common compression methods (e.g. MPEG-2, H.264, H.265), DV compresses images individually, so in the stream, there are no dependencies between images. You can imagine DV as a stream of 64 KB JPEG images. This allows frame-exact editing and allows for simpler encoder and decoder hardware, but means that a higher data rate is required for the same quality. A 25 MBit/sec DV stream is roughly equivalent to a 10 MBit/sec MPEG-2 stream and a 3 MBit/sec H.264 stream.
DV is an excellent match as an intermediate digital representation or even as an archival format for pretty much all analog media, it even surpasses LaserDisc and matches DVD in luma and chroma resolution (PAL values; NTSC are similar):
| Format | Luma | Chroma |
|---|---|---|
| VHS | 320×576 | 40×288 |
| Betamax | 333×576 | 40×288 |
| S-VHS | 560×576 | 40×288 |
| Broadcast | 440×576 | 120×288 |
| LaserDisc | 560×576 | 120×288 |
| DVD | 720×576 | 360×288 |
| DV | 720×576 | 360×2881 |
DV’s DCT-based compression is lossy but quite gentle, and given the increased resolution of DV compared to all analog media, it will capture virtually all data from the analog media.
Digital SD Camcorders
There are two types of digital standard definition camcorders:
- MiniDV (1995) was the industry standard. It uses a proprietary cassette format.
- Digital8 (1999) by Sony re-uses the same tapes as the analog Hi8 format.
Both Digital8 and MiniDV camcorders store a DV stream on tape and all devices come with a 4-pin FireWire/IEEE-1394/i.LINK connector that allows losslessly copying the DV stream from the camcorder to a second device or to a computer, or copying a DV stream to the device.
In addition to an analog video output (for connecting it to a TV), many camcorders also have an analog composite or even S-Video input. Unless the firmware has this feature disabled to avoid the European tax on video recorders (check the manual!), these camcorders can record analog video from an external input, or output a live digitized DV stream over FireWire (“DAC”).
This is what we will be using, so the tape format of the camcorder does not matter, since we won’t be using tape.
Setup
You need
- a high quality player for your VHS, Beta, Video 2000, LaserDisc etc. media
- a composite or S-Video cable plus audio to connect the player to the camcorder1
- a Digital8 or miniDV camcorder that supports digitizing external sources (“DAC” functionality).
- an Apple Mac with a FireWire or Thunderbolt port, so:
- any iMac, Mac mini, Mac Studio, Mac Pro or MacBook Pro
- MacBook Air since Mid 2011
- MacBook up to (!) Mid 2009, except Aluminum 2008
Depending on what kind of Port your Mac has, you need the following cables and adapters:
| Port on Mac | Cables | Images |
|---|---|---|
| FireWire 400 (1999-) |
4-pin (DV) to 6-pin (FW 400) | 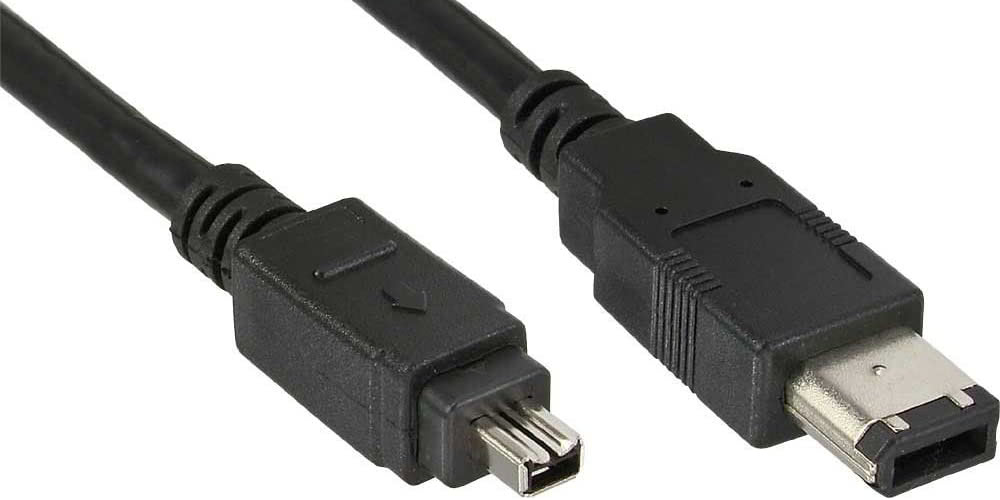 |
| FireWire 800 (2009-) |
4-pin (DV) to 9-pin (FW 800) | 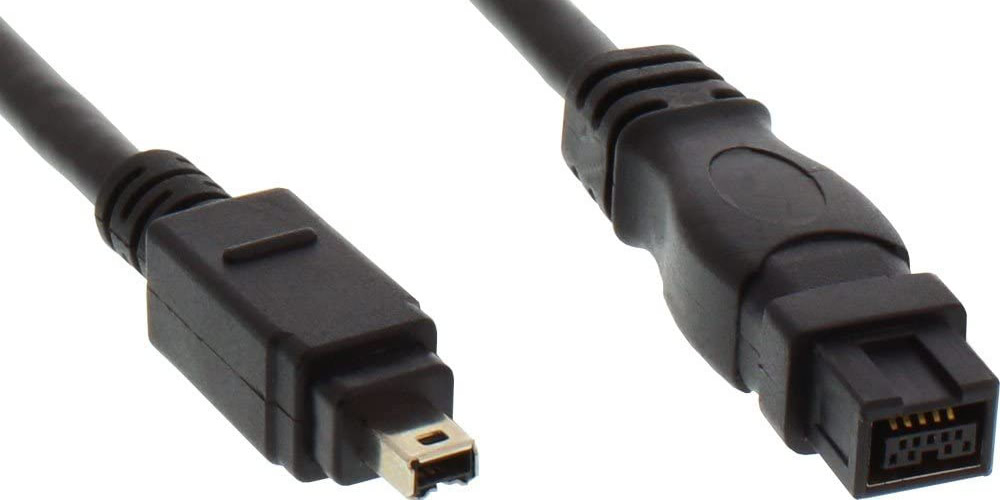 |
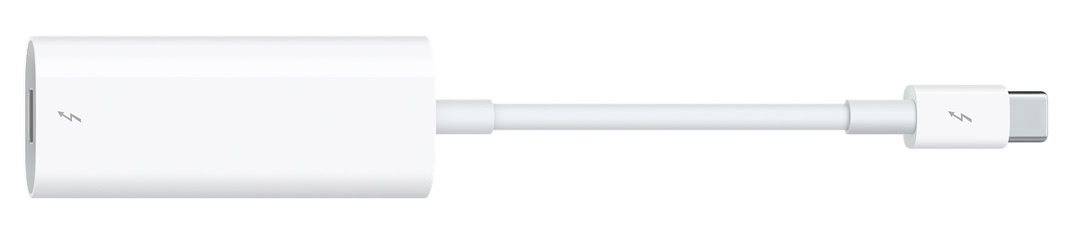
| Thunderbolt 1/2 (2011-) |
4-pin (DV) to 9-pin (FW 800) Thunderbolt to FireWire adapter |
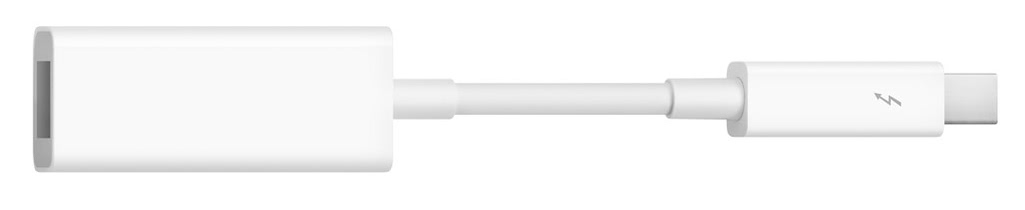 |
| Thunderbolt 3/4 (2016-) |
4-pin (DV) to 9-pin (FW 800) Thunderbolt to FireWire adapter Thunderbolt 3 (USB-C) to Thunderbolt 2 Adapter |
 |
The older the Mac, the fewer adapters you will need, but the more hassle it will be installing the necessary software. The sweet spot seem to be late FireWire 800 Macs (model years 2011-2012) or Macs with Thunderbolt 1/2 (model years 2011-2015).
Installing Tools
macOS supports DV video over FireWire natively, so you can open QuickTime Player, and select “File -> New Movie Recording…” to preview what is being transmitted by the camcorder. While QuickTime Player can record, the resulting video will already be deinterlaced using the low-quality “blend” method.
Apple’s iMovie has a dedicated DV/FireWire import function that will save MOV-encapsulated DV video, but has the habit of silently stopping recording when there is an empty area of the source tape.
The open source ffmpeg tool not only allows grabbing the original DV bits from FireWire, it can also convert video in all kinds of formats.
If you are running macOS 11 (Big Sur) or later, install Homebrew, and then install ffmpeg with this Terminal command:
brew install ffmpeg
Homebrew should also work but is unsupported on 10.11 (El Capitan) through 10.15 (Catalina). If Homebrew does not work on your version of macOS, you may want to find an ffmpeg binary through other means or consider upgrading to a later version of macOS – maybe even through OpenCore Legacy Patcher.
Digitizing
Make sure the camcorder’s audio is configured to 48 KHz 16 bit mode (as opposed to 32 KHz 12 bit). Connect the camera to the Mac and switch it into “PLAY” or “DAC” mode. Then run the following Terminal command to list the available capture devices:
ffmpeg -f avfoundation -list_devices true -i ""
On my MacBook Pro, this prints:
AVFoundation video devices:
[0] DCR-TRV520E
[1] FaceTime HD Camera
[2] Capture screen 0
AVFoundation audio devices:
[0] Speaker Audio Recorder
[1] MacBook Pro Microphone
It detected the Sony DCR-TRV520E. We will have to pass this device name whenever we want to read DV data with ffmpeg.
To capture the video tape into a DV stream, enter the following command (replacing the device name) and press PLAY on the VCR immediately after.
ffmpeg -f avfoundation -capture_raw_data true -i "DCR-TRV520E" -c copy -map 0 -f rawvideo video.dv
Once the tape is finished, press Ctrl+C to stop recording. If you want to automatically stop the recording after a certain time, you can add something like -t 4:10:00 (4h 10m) to the command line.
You can monitor the progress by looking at the camcorder’s viewfinder or LCD, or by using this command in a different Terminal window:
tail -f video.dv | ffplay -i -
Compressing
While DV is an excellent archival format, it’s also big: about 11 GB per hour. MPEG-2 can slash this by a factor of three (4.5 GB per hour). The following line recompresses the DV into DVD-quality MPEG-2, leaving the interlacing intact.
ffmpeg -i video.dv -b:v 10M -flags +ildct+ilme video.vob
Here is the corresponding line to encode the video in H.264 at 3 MBit/sec, which is about the same quality, and also with interlacing intact. This will be a little more than 1 GB per hour – 10 times smaller than DV.
ffmpeg -i video.dv -b:v 3M -flags +ildct+ilme video.mp4
While H.265 has some basic support for interlaced video, neither ffmpeg nor VLC support it without tricks, and AV1 does not support interlaced video at all. Consequently, H.264 is effectively the latest compression format that you should use to store interlaced video.
On-the-fly Compression
Any Intel or Apple Silicon Mac can also encode MPEG-2 in real-time. The following line skips the intermediate DV file:
ffmpeg -f avfoundation -capture_raw_data true -i "DCR-TRV520E" -c copy -map 0 -f rawvideo pipe:1 | ffmpeg -i - -b:v 10M -flags +ildct+ilme video.vob
And this is the line to encode straight into H.264. You will need a 2015 or newer Mac for this, otherwise it won’t be able to keep up with the incoming data.
ffmpeg -f avfoundation -capture_raw_data true -i "DCR-TRV520E" -c copy -map 0 -f rawvideo pipe:1 | ffmpeg -i - -b:v 3M -flags +ildct+ilme video.mp4
Deinterlacing
If you need the video in progressive format, you can use the following commands to deinterlace the video. You should try the 50/60 Hz command first, which will retain motion smoothness. If the resulting video contains every frame twice (verify by single stepping with the arrow keys in QuickTime), the original material was 25/30 Hz, so you can to re-do the deinterlacing with a frame rate of 25/30.
MPEG-2, 10 MBit, 50/60 frames per second:
ffmpeg -i video.dv -vf yadif=1:-1:0 -b:v 10M video.vob
MPEG-2, 10 MBit, 25/30 frames per second:
ffmpeg -i video.dv -vf yadif=0:-1:0 -b:v 10M video.vob
H.264, 3 MBit, 50/60 frames per second:
ffmpeg -i video.dv -vf yadif=1:-1:0 -b:v 3M video.mp4
H.264, 3 MBit, 25/30 frames per second:
ffmpeg -i video.dv -vf yadif=0:-1:0 -b:v 3M video.mp4
H.265, 1.5 MBit, 50/60 frames per second:
ffmpeg -i video.dv -vf yadif=1:-1:0 -c:v libx265 -b:v 1.5M -tag:v hvc1 video.mp4
H.265, 1.5 MBit, 25/30 frames per second:
ffmpeg -i video.dv -vf yadif=0:-1:0 -c:v libx265 -b:v 1.5M -tag:v hvc1 video.mp4
While the YADIF filter in ffmpeg does a pretty good job, there are now also machine-learning based tool like Topaz Video AI for deinterlacing.
Remember though that you should archive the original interlaced data, since deinterlacing is lossy.
Limitations
This method only captures the 720×576 (720×480) video signal and one stereo audio track of your media. Depending on the media, there may be information that is not captured:
- PAL broadcast recordings usually contain teletext, albeit with lots of errors, because of the insufficient bandwidth of tape.
- NTSC broadcast recordings and pre-recorded media usually contain closed captioning.
- VHS contains a mono track and an optional HiFi stereo track. VHS players pick the HiFi stereo track if it exists, so this solution will not capture the mono track which, in theory, could contain entirely different audio.
- LaserDisc can contain digital audio (PCM, Dolby Digital or DTS). If you want to capture the audio losslessly, you need to record it in parallel using an S/PDIF connection.
In general, the recording will only be as good as the player can decode the media. If you don’t have access to a good player or if the media has defects, you may want to talk to a company that specializes in digitization services.
Simpler Solutions
If the solution described in this setup seems overkill, there are simpler solutions as well:
-
A DVD recorder (or a VHS/DVD combo device like the Panasonic DMR-EX98V and DMR-EX99V) can convert analog sources (or VHS directly) into high-quality interlaced MPEG-2 files written to a recordable DVD. The downside is that these devices are usually limited to two (DVD-5), maybe four (DVD-9, i.e. dual-layer) hours of recording at 10 MBit/sec because of the limitied capacity of a DVD.
-
There are devices that connect to the analog signal on one side and to a computer’s USB port on one side. The PC/Mac software will usually create a deinterlaced MP4 file.
-
Technology Connections describes a solution where you connect the video player to an analog-to-HDMI box, and its output in turn to a device that records HDMI onto an SD card. This will also deinterlace the video.
Links
- Old Video Tapes Conversion via Thunderbolt / Firewire
- Capturing and Archiving MiniDV Tapes on macOS
- DVRescue
- HDTV subjective quality of H.264 vs. MPEG-2, with and without packet loss
-
NTSC DV uses 4:1:1 chroma subsampling instead of PAL’s 4:2:2, so it has a Chroma resolution of 130×480. This still surpasses all consumer formats – except DVD.↩
-
Always use an S-Video connection if the player supports it! If the connector exists, it means the media supports a higher-than-composite color bandwidth, which is only available through S-Video.↩
The beauty of using one of these vintage camcorders – or standalone DV converters – for non-professional digitization work is its simplicity. The downside of this method is that tapes which are in poor condition – needing time-base stabilization – can experience unique breakups / artifacts, the nature of which may depend upon the particular digitizer in use. (Which is why some use DVD recorders as ersatz time-base stabilizers – a practice that I do not recommend.)
Instead of a DV device, one might consider the use of a digitizer in the Blackmagic Intensity line – which is also readily available on the used market – and avoid the use of the DV interface. These devices do not de-interlace. (And, I believe, are also supported in ffmpeg.)
The one additional note that I would make, from hard experience, is that `brew` and vintage OSX installations / hardware do not mix well. When I recently attempted to build ffmpeg on a High Sierra system (on a 2011 Mac Mini), that led to an incredibly long, convoluted, and unfriendly build process, which at the end resulted in a broken version of the program. The only way I was able to get a non-broken version of ffmpeg for that system was downloading a “static” build of ffmpeg from their official site.
There are better solutions used for retrocomputing – upscalers. I suggest to check out Medusa (https://lotharek.pl/productdetail.php?id=135) which is one of the best. Yo can convert directly into digital (DVI which is forward compatible with HDMI – you can buy cheap DVI-HDMI cable and it is 100% passive device). Than You use HDMI grabber and you’re home :).
Avoid cheap upscallers – they work but are crap.
The best thing about this technique is that it preserves the original line structure. I have been mulling over ideas to best combine presentation with preservation for general interlaced content, and generate a 1280×960 video with vertical nearest-neighbor scaling, and a deinterlacing algorithm that leaves the original scanlines unperturbed, only interpolating the missing lines. Pad that to 1920×1080 and you have a file with which you can not only comfortably watch on almost any display with only minor windowboxing, but also recover the original scanlines from the video. Horizontal scaling is less necessary to do in a nearest-neighbor fashion, since analog video does not store discrete pixels, only discrete scanlines. The idea could further be modified for “double-strike” 240p or 288p content, to recover the original scanlines that may have been passed through a TBC at some point (say, preserving old Nintendo VHS/LaserDisc footage).
I remember making a crude B&W video digitizer by feeding the analog signal into a simple one chip A/D converter and recording the input to the parallel port. It was very low res but it needed less than $15 in parts.
I did something like this back in 2013. I bought a used http://pro.jvc.com/prof/attributes/tech_desc.jsp?model_id=MDL101333&feature_id=02
For $300 which had a TBC. Then I digitized the vhs to dv. And then ran many many virtual dub scripts to enhance color, deinterlace, and even stabilize about 300hours of footage. Took a few weeks of processing after lots of trial and error. And adventure to be sure!
There are very strong differences in between different framegrabbers essentially when dealing with unstable sources like VTRs.
For standard consumer video cassettes (V2000) I’m actually considering digitizing the raw signal from the heads. There is already a project for doing that with Laserdisks, and some people tried to adapt that to video, which of course doesn’t work because of the different timing impairments. While Laserdisks have a continuous stream of data without any jumps, consumer VTRs have a jump in sync whenever they switch heads, which is once per frame. The obvious advantage is that you have finer control of how you deal with dropouts or crispening. This probably would also lead to much better decoding of teletext, as you skip non-linear processing steps.
Deinterlacing itself is a fairly well solved problem these days. Adaptive algorithms which are based on the difference between pixel values over successive fields, give you very decent de-interlacing while keeping the original full resolution. Or as the BBC once found out in the 1980s, the simplest algorithm already works so well, they didn’t bother to investigate any further.
BTW the far greater problem with digitizing classical analogue content is luma chroma separation. That’s why one should always use component or s-video if available. For the rest you need high quality PAL decoders. Just because it was expensive and “professional” it doesn’t have to be good, as can be seen on many bad DVD masters.
Consumer PAL decoders are not rather good, BTW. They are able to show a signal at the colour subcarrier frequency as monochrome, while decoding colour near perfectly.
What a good guide! Step by step. Information collected from all sources close to gem. Thanks you!
Thank you PageTable for this analogue to digital page.
Years ago I used a Sony dig.8 camcorder to digitise my Hi8 tapes. Hundreds of them.
It seemed to work fairly well.I fed the output into a Sony Mini dv/dv cam deck to create mini dv casettes. Later they got fed into my Mac to use with Final Cut. One thing I could never work out was whether the Sony deck de-interlaced my analogue tapes. A couple of years ago I bought Topaz AI & enjoy the results. If I chose interlaced in Topaz the results are not good but if I chose progressive the results show no saw edges. Does this suggest that the signals were converted by the Camera?